Showing posts with label Project Based Learning. Show all posts

Wednesday, April 10, 2024

3 Compelling Reasons to Dive into Project-Based Learning Before the School Year Ends #PBLChat

As we approach the end of the school year, I wanted to take a moment and encourage teachers who are looking to do something a little different to explore Project Based Learning (PBL) for their classroom. I have three reasons I have put together that I hope will convince you to give it a try. 

1. Real-World Relevance

One of the most exciting aspects of PBL is its ability to connect classroom learning to the real world. By engaging in projects that tackle real-life problems or questions, students can see the direct impact of their learning. This relevance not only boosts engagement but also helps students understand the practical applications of their knowledge. When students are starting to get distracted by the warmer weather and the itch to run and play, having students engaged in work that connects to their lives will make it easier to engage more fun for them to complete their work. Having something that connects to their lives to share at the end of the school year is wonderfully valuable. 

2. Collaboration and Communication

PBL naturally fosters collaboration and communication skills among students. As they work together to brainstorm, research, and execute their projects, they'll develop essential teamwork skills that are invaluable in both their academic and future professional lives. This collaborative environment also encourages students to share their unique perspectives and learn from one another, creating a richer learning experience for all. One of the most important things I try to encourage is the exchange of ideas. When students see how others think, problem solve, and learn in general, it often helps them better understand how they learn and that is something powerful that PBL brings to the table. 

3. Critical Thinking and Creativity

In a PBL setting, students are encouraged to think critically and creatively as they navigate challenges and develop solutions. This process not only enhances their problem-solving abilities but also allows them to tap into their creativity in meaningful ways. Whether they're designing a product, creating a presentation, or crafting a persuasive argument, students will have the opportunity to stretch their minds and think outside the box. As students get a bit antsy toward the end of the year, having students create with their hands and solve problems helps keep them focused on the work they are doing and helps the class make it to the end of the year with fewer disruptions. 

So, why not give PBL a try before the school year ends? It's a fantastic way to engage students, foster essential skills, and make learning more meaningful and fun. Plus, it's a great way to end the year on a high note, with students feeling empowered and inspired by their accomplishments. Let me know if you have your own reasons why teachers should try PBL in the classroom. 

Friday, February 23, 2024

Motion Comics with @AdobeExpress #AdobeEduCreative #MakerEd

I wanted to share a clip of a video I assembled based on the motion comics my students created. Students used Adobe Express to create all of the images and pages of their comic. We took pictures using a green screen and the students used Express to remove the background and animate them based on their storyboard design they created. Here is an image of one of the pages.

The first graders were able to name their superhero and keep the mask and cape. This was such a fun process and showcased what can be possible using Adobe Express and looking for creative, engaging solutions to traditional curriculum items. In this case, plotting and pacing a story for a younger audience. You can follow more of these types of projects on Instagram, Twitter (X), and TikTok. 


@thenerdyteacher Students in my Innovation and Digital Design Class partnered with 1st grade buddies and used @adobeexpress to turn them into superheroes! Combining green screens with animation features once the background was easily removed, students were able to bring their storyboards to life. Check out my website for more info. #FYP #TeacherFYP #adobe #Education #MakerEd #teachersoftiktok #TeacherTok ♬ Marvel Studios Fanfare - Geek Music

Monday, January 15, 2024

Igniting Social Studies Lessons with Creativity #SSChat #EdChat #AdobeEduCreative

Hey there, fellow educators! If you're searching for a fun and engaging way to spice up your social studies lessons, look no further than Adobe Express! This user-friendly tool offers a creative spark to your classroom activities, making history and geography lessons more exciting than ever. Let's dive into two fantastic ways to use Adobe Express in your social studies classroom.

1. Create Digital Timelines:

History comes alive when you turn it into an interactive journey through time. Adobe Express' 'Poster' feature allows you to create stunning timelines. Here's how:

  • Choose a historical event or a period you want to teach.
  • Have students research and gather information about key moments, people, and dates.
  • Use Adobe Express' 'Poster' feature to create a series of pages, each representing a different event or date.
  • Add images, videos, and text to each page to provide a comprehensive overview.
  • Encourage students to include their own commentary or analysis.
  • Share the interactive timeline with the class, allowing them to explore and learn at their own pace.
Here are a couple of examples. If the students add video to the pages, they would be able to download the entire project as a video and the timeline could play for class.

2. Visual Essays:

Bring the power of visual storytelling into your social studies classroom with Adobe Express' 'Video' feature. This is perfect for exploring complex topics like world cultures, geopolitics, and historical events:

  • Assign a topic or let students choose their own social studies theme.
  • Have them conduct research and gather visual content such as images and video clips.
  • Utilize Adobe Express' 'Video' feature to create a visually stunning essay.
  • Encourage students to include narration, text overlays, and transitions to convey their message effectively.
  • Share the visual essays in class, promoting discussion and critical thinking about the topic.

Here is an example.

Click to watch the video!

Incorporating Adobe Express into your social studies classroom not only enhances engagement but also equips your students with valuable digital skills. It encourages creativity, critical thinking, and collaboration while making learning more enjoyable.

So there you have it, two exciting ways to ignite your social studies classroom with Adobe Express! With this tool, you can turn history into an adventure and complex topics into captivating visual essays. Get ready to inspire your students and watch their enthusiasm for social studies soar!

Hugs and High Fives,

The Nerdy Teacher

Thursday, September 14, 2023

Beyond Paper and Pencil: Innovative Assessments with @AdobeExpress #AdobeEduCreative @RebeccaLouHare

One of the things that has had me excited this school year is really diving into the updated Adobe Express and seeing how it can be used for assessment. When I showcased Express to my teachers at the start of the year, there were plenty of "oohhs" and "ahhhs". Animate from Audio really got the foreign language teachers excited because they saw it is a great way to engage students who have been historically shy about recording themselves speaking and sharing it with class. Being able to choose a silly avatar represent their words should reduce much of their anxiety. I was thinking of other ways that content areas might use Adobe Express for assessment. 

Here are four ways you can tap into the power of Adobe Express to evaluate your students' understanding and skills in innovative ways.

1. Digital Storytelling: Narrate a Historical Event

Digital storytelling is an exciting avenue for students to connect with historical events, as they use visuals and narrative to bring the past to life. Using Adobe Express, students can select a variety of images, design elements, and text to depict significant historical events.

How It Works: Assign a specific historical event or period. Ask students to research and then construct a digital story that provides a visual narrative. Not only does this allow them to dive deep into historical context, but they can also explore themes, significance, and personal connections. As an assessment, you can evaluate their research skills, storytelling abilities, and their grasp of historical context.

2. Scientific Process Visualization: Detail an Experiment's Progress

Sometimes, the best way to understand a scientific process is to see it visually. Adobe Express provides a platform where students can design infographics or visual reports that detail each step of their scientific experiment.

How It Works: After completing an experiment, students can use Adobe Express to create a step-by-step visual report. This will demonstrate their understanding of the scientific method and the specific experiment they conducted. By breaking down each stage with visuals, students can clearly communicate their process, findings, and conclusions.

3. Literary Analysis: Visual Book Reports

Gone are the days of the standard written book report. Let's elevate the experience with visual book reports! Students can utilize Adobe Express to craft a creative representation of their chosen book, including key themes, character developments, and critical scenes.

How It Works: Students select a book they've read and use Adobe Express to craft a visual book report. They can include quotes, images representing key scenes, and their own designs. By juxtaposing these elements, students can offer their interpretation and analysis of the book, showcasing their comprehension and critical thinking skills.

4. Geometry in Real Life: Shapes and Design

Geometry is everywhere, and Adobe Express can help students see it. By tasking students with identifying and outlining geometric shapes in real-world photos, they can connect classroom lessons with their surroundings.

How It Works: Students take or find pictures of real-world objects or scenes. Using Adobe Express, they highlight and label the different geometric shapes they identify. This assessment not only tests their knowledge of geometry but also their ability to connect theory with real-world application.

Adobe Express has proven to be more than just a design tool. It's a gateway to interactive and immersive learning experiences, allowing educators to assess students in ways that are both engaging and insightful. By incorporating these creative assessment methods into your teaching approach, you not only evaluate student understanding but also foster skills like critical thinking, creativity, and technological literacy. 

Hugs and High Fives, 

NP

(Images generated using Adobe Firefly.)

Monday, May 22, 2023

Navigating Spring Fever: 5 Classroom Management Strategies #EdChat

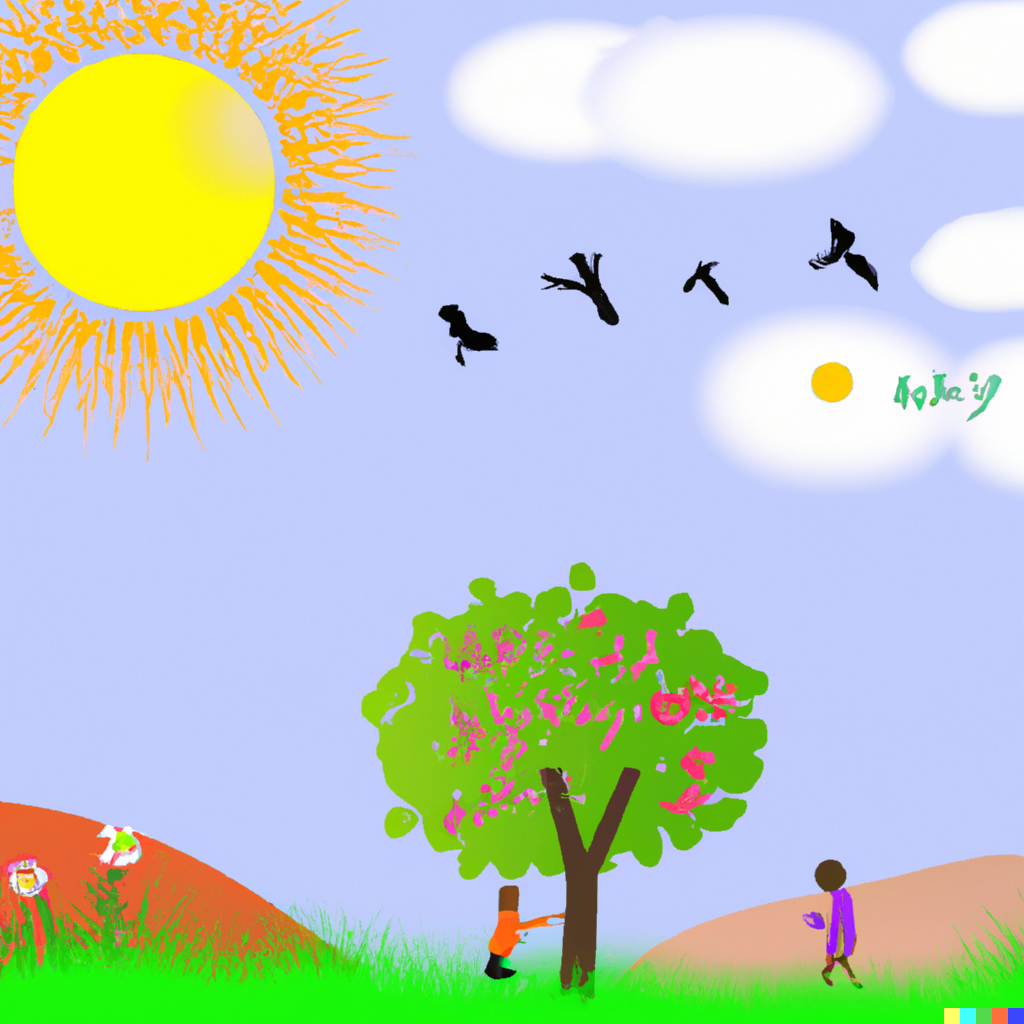
Generated by DALL-E

Springtime, with all its freshness and warmth, can also herald the onslaught of classroom daydreams about summer vacation. Fear not, we've got you covered with five actionable strategies to keep your students engaged and eager to learn, even as the sun shines brighter outside. Let's dive in.

1. Change the Scenery: Step Outside

Rather than fighting the allure of the great outdoors, embrace it! There's so much educational potential waiting outside the traditional classroom. Let's say you're an English teacher; why not hold a "Shakespeare in the Park" session where students take turns performing monologues from The Bard's classics? It’ll not only provide a refreshing change of scenery but also enable a deeper, more immersive understanding of the text.

2. Engage Their Hands and Minds: Project-based Learning

With the spring air comes a fresh energy, perfect for more hands-on learning. Imagine your students constructing a scaled solar system model in the school field, with each student responsible for one celestial body. This project could combine math (for accurate scaling), art (for the creative representation), and science (for the knowledge about each planet), leading to an engaging and interdisciplinary learning experience.

3. Get Them Moving: Active Learning

Incorporating movement into your lessons can help students refocus their energy and improve academic performance. Try something like a "math-olympiad" competition, where students solve problems relay-style. Each student solves a step of the problem before passing it on. Not only does this reinforce math skills, it also emphasizes teamwork and communication.

4. Take a Breather: Structured Breaks

Giving students short, structured breaks can help mitigate dwindling attention spans. For instance, try the Pomodoro technique: 25 minutes of focused work, followed by a five-minute break. During the break, students could stretch, doodle, or discuss their favorite summer activities. This gives them a breather and resets their focus, ready for the next learning sprint.

5. Tap into Their Excitement: Relate Lessons to Summer Activities

The imminent summer break is high on your students' minds, so why not weave it into your lessons? If you're teaching percentages, create a mock shopping scenario for a summer camping trip. Students must calculate discounts on camping gear, figure out tax, and stay within a budget. Not only does this make learning fun, it also shows them how classroom concepts apply in real-life situations.

Remember, it's all about channeling the high spring energy into constructive and interactive learning experiences. You might just find that these new approaches add a vibrant, joyful note to your teaching this spring.

Hugs and High Fives, 

NP

Monday, April 17, 2023

Getting Started with Adobe Express: A Beginner's Guide to Creating Stunning Visuals #AdobeEduCreative

Today, we're excited to introduce you to Adobe Express, a powerful yet user-friendly tool for creating eye-catching visuals, perfect for social media, websites, or presentations. With an easy-to-use interface and an extensive range of features, Adobe Express is perfect for both beginners and experts alike. In this post, we'll walk you through one of its most popular features - creating custom graphics. Let's dive in!

Step 1: Open Adobe Express and Select a Template

To get started, head over to the Adobe Express website (https://www.adobe.com/express/) and sign up for a free account. Once you're logged in, you'll find a wide array of templates to choose from. These templates are organized by theme and purpose, making it easy to find the perfect starting point for your design. Select a template that best fits your needs and click on it to open the editor.

Step 2: Customize the Text

One of the first things you'll notice in the editor is the pre-existing text, which you can easily customize to suit your needs. Simply click on the text box and start typing your own content. To change the font, size, color, or alignment, use the options provided in the toolbar above the text box. Feel free to experiment with different styles until you achieve the desired look.

Step 3: Add Images and Icons

To make your design truly unique, you can add images and icons from Adobe Express's extensive library. Click on the "Add" button in the left-hand toolbar and select "Photo" or "Icon" to search for the perfect addition to your design. Once you've found the right image or icon, click on it to add it to your graphic. You can then resize, rotate, or reposition it as needed.

Step 4: Customize the Background

Adobe Express allows you to customize the background of your design with colors, gradients, or even images. Click on the "Background" option in the left-hand toolbar and choose between "Color," "Gradient," or "Photo." You can select a color from the palette, create a custom gradient, or search for a background image that suits your design.

Step 5: Save and Share Your Creation

Once you're satisfied with your design, it's time to save and share it. Click the "Share" button in the upper-right corner of the screen and select the desired file format (JPG, PNG, or PDF). You can also choose to share your design directly to your favorite social media platforms or via a unique link.


And that's it! With just a few clicks, you've created a stunning custom graphic using Adobe Express. Whether you're designing social media posts, website banners, or presentation slides, this powerful tool makes it easy to create professional-looking visuals that leave a lasting impression. So, go ahead and unleash your creativity with Adobe Express!


Thursday, April 6, 2023

Quick! Look at these PBL Tips! #EdChat #MakerEd

5 very quick tips on using PBL in the classroom. 

Start with a clear driving question or problem statement.

The driving question is the heart of any PBL project. It should be open-ended, challenging, and relevant to the students' interests and experiences. It should also be clear enough to guide the students' work, but open enough to allow for creative solutions. The driving question should be introduced at the beginning of the project, and revisited throughout to ensure that students stay focused on the problem they're trying to solve.

Create opportunities for collaboration.

Collaboration is an essential component of PBL. It allows students to work together, share ideas, and build on each other's strengths. Teachers should create opportunities for collaboration throughout the project, such as in-class discussions, small group work, and peer feedback sessions. Teachers should also model effective collaboration skills and help students develop their communication and teamwork skills.

Provide access to resources.

PBL projects require access to a variety of resources, such as books, videos, websites, and experts in the field. Teachers should provide students with access to these resources, either through the school's library or online. Teachers should also help students evaluate the quality of the resources and guide them in their research.

Emphasize the process, not just the product.

The process of PBL is just as important as the final product. Teachers should help students understand the steps involved in the project, such as brainstorming, researching, prototyping, and presenting. Teachers should also encourage students to reflect on their learning throughout the process and provide feedback on their progress.

Celebrate and showcase student work.

Finally, it's important to celebrate and showcase student work. Teachers should provide opportunities for students to present their work to the class, the school, or the community. Teachers should also provide feedback and recognition for students' hard work and creativity. This helps students feel valued and motivated to continue learning.

PBL is a powerful teaching methodology that promotes deeper learning and engagement. By starting with a clear driving question, creating opportunities for collaboration, providing access to resources, emphasizing the process, and celebrating and showcasing student work, teachers can create dynamic and effective PBL projects that help students develop essential skills for success in the 21st century.

Monday, March 6, 2023

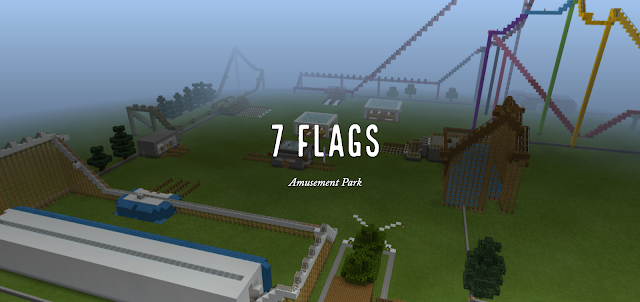
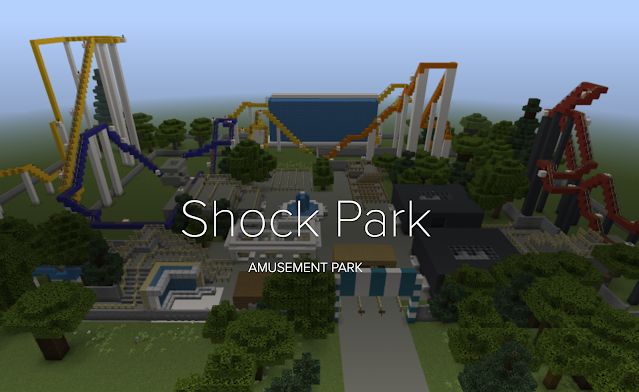
Using Minecraft to Design Amusement Parks @PlayCraftLearn #MakerEd

My Innovation and Design class has been a work in progress since I created it in 2020. Lots of ups and downs as I tried to figure out the balance of all of the different types of projects I wanted students to explore over the course of the trimester. I feel like I finally landed on something that is working and I wanted to share it here. 

I wanted students to think big for their Minecraft project but felt like I never had the time to give them because of the other projects. I also noticed that there are some projects that require waiting and do not take the entire class period. For example, making the cutting boards requires wait times as boards are cut and glued together. I don't want students just sitting and waiting for projects to glue, so I realized that a long-term Minecraft project might be the thing I have been looking for to solve my time problem. In retrospect, it is a pretty simple solution to the problems I was having, but, sometimes, things just take longer to click. 

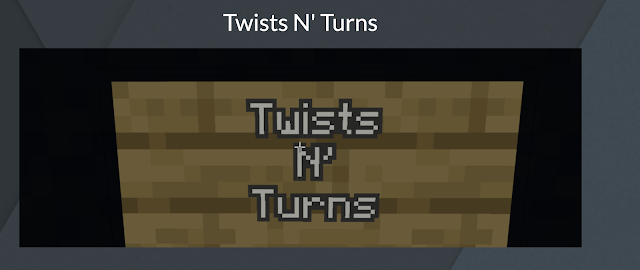
I introduce the Minecraft assignment to students at the start of the trimester and let them know it will be due at the end of the trimester. Students will be given days during the class to work on it, but they will also have time in other classes when they are waiting for projects to print on the 3D printer, be cut on the laser cutter, or finish glueing. These times will keep them active in the design and build process while waiting for other projects to finish. I rolled this out for the past trimester and I think it worked very well. Students worked here and there on their build and created some amazing projects. I think I would give more in class time on the assignment as some students felt rushed at the end, but that might also be just Middle School time management issues. The start of the third trimester will give me a chance to tweak anything as I have another go at the approach. Below you will find the activity I assign on Seesaw and a few of the completed projects you can click on and will be taken to their sites. Some students used Adobe Express to create a website and others used Google Sites. 


The Google Sites created below can only be accessed by students and staff from our school. 


The students were excited to showcase their work and there were great conversations about what goes into a website that is trying to sell people on what they have to offer. Spelling and grammar conversations were had as students talked about what a website that is filled with errors might say about a business. Most of all, time management was a big part of the conversation since many students planned for something much bigger, but underestimated the time it would take to complete much of their park. My class is about failure as much as it about design and creation. Learning those hard lessons on time management and completing tasks in a timely manner are tough lessons to teach, but learning them in an environment where they do not have to be afraid of failing their assignment or class because they tried something big is important to me. (My class does not have homework or grades to push student to try big ideas and see how they work.)

Like many other teachers, I know that my class is a constant work in progress, but I wanted to share this win because sharing good things once in a while is good for a teacher's soul. 

Hugs and High Fives, 

Nick

Wednesday, March 1, 2023

5 Steps to Bring Project Based Learning to Your Classroom #PBL #STEAM #STEM


There are plenty of ways to integrate Project Based Learning (PBL) to your classroom, but sometimes you just want to get started without have to sort through pages and pages of information. I think I can help cut through the noise and offer 5 steps to get rolling with PBL in your classroom. This is not an exhaustive list; just more of a quick set-up guide for the teacher looking to give PBL a chance in their classroom. 

1. Identify the topic - The very first step is to figure out what you want the students to learn. This might seem very basic, but sometimes we forget the focus of our work and the students are just being kept busy. The topic could be a real-world problem that students need to explore. This is a common approach used in PBL, but it doesn't have to be the only way to focus a PBL assignment. These could be engineering problems, other STEAM associated problems, or something that is specific to your classroom. No matter what you choose, it needs to be something that allows students to explore in detail and be able to create something to address the issue. 

2. Create the structure of the project - Once the topic has been clearly defined, a structure needs to be in place for the students. How detailed this structure is usually depends on the age of the students. The younger the students, the more rigid the structure tends to be to provide the students with important guidance. Older students tend to have more freedom to explore the topics and create their project. The project can also be in a group format or it can be a solo one. How much time are you going to give the students, how are they going to be assessed (I suggest rubrics), how will students present their work at the end, and any other details the students are going to need to best complete the project. These are the important structural issues for PBL that are not fun to talk about or showcase, but they are fundamental in supporting the success of the work. 

3. Be present - Many people think that teachers that are using PBL in their classroom just sit at their desk grading papers or reading the paper. This could not be further from the truth. I have found that I have always been more active in my classroom when students are working on a project. I am moving from group to group and checking in on their work. Some students will need more support than others, but that is true for any assignment in class. It is important not to answer all of the questions student pose because the research part of PBL is important and it is a skill students need to work on as they go through school. Pointing students in the best direction as they research and explore is helpful to these groups when they start to get stuck. Being present with the students as they go through the process of exploring their topic and create potential solutions is very fun. I diverse class will come up with a wide variety of projects and that makes things much more interesting in the classroom and being there guiding the students is key in getting them to their final steps with the project. 

4. Utilize technology - One of the ways that PBL really shines is the way that it can all for the incorporation of technology. Students should be encouraged to take notes digitally if possible and share with the group. Their are many different tools that can be used to create a final presentation that are not a slideshow. Creating videos, animation, graphic novels, and more are now accessible to students thanks to a wide variety of tools. Creating a list of tools that students can use can help make the process a little easier for students and that list will grow over time as students find their own they share with class. Having students use different tech tools also helps them grow their skill set while working on their PBL in class. 

5. Be ok not calling all of the shots - The toughest part of PBL is that it allows freedom to students to fully explore ideas and showcase what they learned and how the problem the researched could be addressed. Teachers are accustomed to dictating all aspects of any work that a student needs to complete that PBL can really cause teachers to feel helpless at times. Students need to be given the space to try something new, make mistakes, and try again. Students will attempt things as part of their PBL that you might be sure is going to fail, only to prove you wrong. On the other hand, the students will try and fail and your job is to help them through the reflective process that is important after failures in the classroom. Giving up some aspects of control is tough for teachers, but it is what is best, and needed, for successful PBL in class. 

These 5 parts of Project Based Learning are great at getting the ball rolling in your classroom. You are going to stumble along the way and find different approaches that will be perfect for your students that might not work for students in another class and that is the beauty of PBL. It is perfect for differentiation. Help students get the most out of their classroom experience in a way that meets them where they are on their learning journey by bring PBL to your classroom. 


Wednesday, February 15, 2023

Using @MakeyMakey To Explore Circuits and Conductivity #MakerEd #SciChat

Students have had a fun past few days building their own controllers for games they coded on MakeCode Arcade. Makey Makey has been a wonderful tool in my Innovation and Design class as well as our Science classes. They can very helpful when it comes to teaching the concepts behind open and closed circuits and conductivity. Here is a link to some great lessons that Makey Makey have created to help introduce students and teachers to Makey Makey and how they work.

Here is how I approached the project with my students in case you want to replicate this in your class. 

Step 1: Recall what circuits are and what conductivity means if they have already studies it or introduce the concepts and ask students to guess what they mean.

Step 2: Introduce or reintroduce the concepts of circuits and conductivity to students. Here is a great lesson from Makey Makey I used with students. 

Step 3: Let students play with Makey Makey and let them figure out what is and is not conductive. Students are given brass brads, Play Dough, paperclips, alligator clips, and an arcade button. They access all the apps that Make Makey has to try and get the Makey Makey to work. 

Step 4: Students use pencil and paper to design the controller for the game they created in the previous lesson. If your students have not created a game, you can let them choose from the games found on MakeCode Arcade. 

Step 5: Students build their controller and test it on their games. 

Step 6: Students post their work to their digital portfolio. 

Here is an Instagram post that showcases some of the controllers that students made. 


One of the things I added to the project were my homemade alligator clip buttons. I took alligator clips, cut them in half, and soldered the wire to a button. Now the students can just clip the alligator end to the Makey Makey to make a button work. The Instagram post below will show you how I did it. 


What is great about this project is how the students have to work through the creation of circuits to make their controllers work. They explored different ways to make it possible to touch the ground and their other conductive items to complete the circuit. Other students figured out that buttons completed the circuit for them when they attached them to the Makey Makey and the ground. The goal of every project in my class is to get students to think about their design and the different ways it is possible to complete the task. Using a Makey Makey to create a controller is a wonderful way to reenforce important Science concepts while giving students a way to creatively demonstrate their understanding of circuits and conductivity. I encourage you to give it a try in your class.  

Thursday, January 19, 2023

An Argument for Project-Based Learning #PBL #EdChat #Education


There are people that are still very wary of project-based learning. I understand that there are questions about why it is better than other pedagogical approaches. There are some educators that are afraid to try and add PBL to their classroom because their school/district is chained to standardized tests and the thought is that PBL doesn't prepare students for those types of assessments. I wanted to give a few reasons why PBL is worth exploring in your classroom. 

1. Active engagement - One of the things that is amazing about PBL is the fact that students are actively engaged in the process of learning. In a traditional model, students are passively receiving the information. When a student is actively engaged, they are more likely to retain the information. If standardized tests are a worry, PBL will allow students to retain more of the material covered in class. Another nice part of active engagement is the energy that comes to the classroom. There are few things better than a jumping classroom because students are actively exploring  a variety of interesting topics. 

2. Soft skill work - When students are working on their projects, they are also getting a chance to work on their soft skills. Communication, collaboration, time management, and other skills are important when working on complex projects. Students will work on these skills many times over during a year filled with projects. Again, the traditional classroom, format has everything structured for the student with very little need to work on the soft skills. A student can sit in the back of a traditional classroom all year without being actively engaged. Those soft skills are important for everyone to have as they mature and enter the workforce. 

3. Ownership - I used to tell students, "If you can't get excited for the project you chose, why on earth would you get excited about the one I choose?" When students choose their project, they have a sense of ownership of their work. They take more pride in it and they commit to the ins and outs of it. There are times when students need to jump through hoops and complete mandated work, but that is true for most people in their jobs. Doing the boring stuff is required so you can do the fun stuff. When the students get to choose what the fun project is going to be, they take full ownership of it and get to work. 

4. Class culture - Classroom culture is important in every school. Creating a community of learners is not easy task. I noticed how students all came together during their different projects. They supported one another and offered feedback and cheered each other one when it was time to present. Students were far more respectful of a student presentation because they know how hard they worked and they wanted the respect of the class when they presented. The bonds that are formed by group projects are an amazing thing to watch. Groups form and create amazing things together and I would hear them talk fondly about them years later. Those memories are connected to the content in a way traditional note-taking instruction could never accomplish. 

5. Differentiation - Our students are on an educational journey and they are all at different points on the trip. PBL allows for students to choose projects, set goals, and share their work in ways that meet their needs. Not all projects are going to look the same and that is a good thing. A classroom full of students will be filled with a variety of IEPs and 504s. As a teacher, crafting different assignments for each of those students every time one is needed can be too time consuming. Allowing more choice in their work with PBL lets the students adjust their work as needed. That way, all of the students will be able learn in a way that is best for them. Over time, I did not have to help those students tweak their projects because they learned what would push them to do their best.

These are just a few reasons why project-based learning is a great thing to bring into your classroom. There are so many other reasons! Check out my book on PBL in the classroom and feel free to reach out if you have questions or are interested in PD on this topic. 

Hugs and High Fives, 

Nick 

Monday, January 9, 2023

Exploring Creativity In The Classroom #MakerEd #EdChat

This school year has been an important year for creativity for me and for my students. I really wanted to give them more ownership of the projects they would be creating. So far, I have seen some great examples of creative problem solving and increased engagement from my students. Here are just a few images of their work this year in the Makerspace. 

There are a few reasons I think you should explore allowing more creativity in your classroom based on what I have seen the past few years in my classes and classes of teachers who have focused on allowing more creativity in the classroom through MakerEd and Project Based Learning. 

1. Creativity supports the love of learning. It is so crucial that we get students to see learning as something that is valuable and to love doing it. You do that my letting learning look differently than the standard sit and get many classrooms have come to embrace. Sometimes students are going to need to sit and listen to information, but there are plenty of opportunities that should allow for students to explore and create. Those moments need to be embraced in the classroom because those are the memories that will be created that support a life-long love of learning. 

2. Bringing creativity into the classroom support critical thinking and problem solving skills. Students that dive into creative exploits often find their original creative idea might not work as imagined. This forces them to problem solve. I saw this with the clock assignment in my Innovation and Design class. Many students had wild ideas on creating clocks and were forced to explore their designs and solve problems when their sketched design was having trouble coming to life. The more students are tasked with exploring problems and creating solutions, the better they will be moving forward. Critical thinking and problem solving are muscles that need to be worked out in all classes from time to time. 

3. I have seen that creativity supports communication and collaboration. When it comes to creative projects, students have lots of ideas. When working in groups on creative projects, students will need to work on their communication skills as they explain their ideas and work on compromises. In the middle school, students are developing these important skills and creative projects are a great way to engage them to support these soft skills. Even if the students are not working on groups, having students work on creative projects gets them excited to share their work and get feedback. That back and forth over a project is also great for students as they learn to give and receive constructive feedback to support their peers. 

4. Creativity is great for boosting the confidence of students. So many students feel like what they are good at is not important in school. Givings students a chance to shine in different ways in the classroom can help boost their self-esteem. Giving students a chance to write a song, build something in Minecraft. paint a picture, or some other creative outlet instead of a worksheet or essay could be a great way to see what students know while giving them a platform to showcase their creativity. Over the years I have had students tell me my encouragement of their art, writing, singing, and other creative talents helped them feel seen in class as more than student in a desk. Those are the moments that remind me that the work outside of the curriculum is so vital. 

I could go on and on about the value of creativity in the classroom, but I will pause with these four reasons for now. If you are new to this idea, please do not be overwhelmed. Take it one step at a time with one lesson at a time. Bringing creativity into the classroom was something that took me time to get just right. You can do it at your pace and the students will forever be thankful for it. 

Hugs and High Fives, 

The Nerdy Teacher

Thursday, January 5, 2023

Be Brave #EdChat


The new year will bring new challenges and this song is going to be one of my many anthems to help me be successful. For all of the educators out there that are feeling run down and are not sure what is next, sometimes, the only thing we can do is be brave, speak up, and do what is best. 

I encourage you to be brave and try that new project or switch some lessons around like you have always wanted. There is a chance you will fail and that is ok. Failure is part of being brave. I might not know you, but I believe in you. You can do it. Be brave. 

The best things in life are hard and being brave is the first step in making change. I hope all of you out there can make the changes you want for 2023 and know you are not alone. An entire community of educators are out there that will help if you are struggling. 

Sending you the biggest hugs and high fives!

Bravely, 

The Nerdy Teacher

Monday, September 12, 2022

Cutting Board Challenge #MakerEd #AdobeEduCreative

We are starting the school year with some fun challenges in our Innovation and Design Level 2 class. I really want to focus on physical making with digital making as a support and design tool. Our first project will be using Adobe Creative Cloud Express to create their own logo. From there, we will use the laser cutter to put their logo on a keychain. Here is my example I will be using with the students,


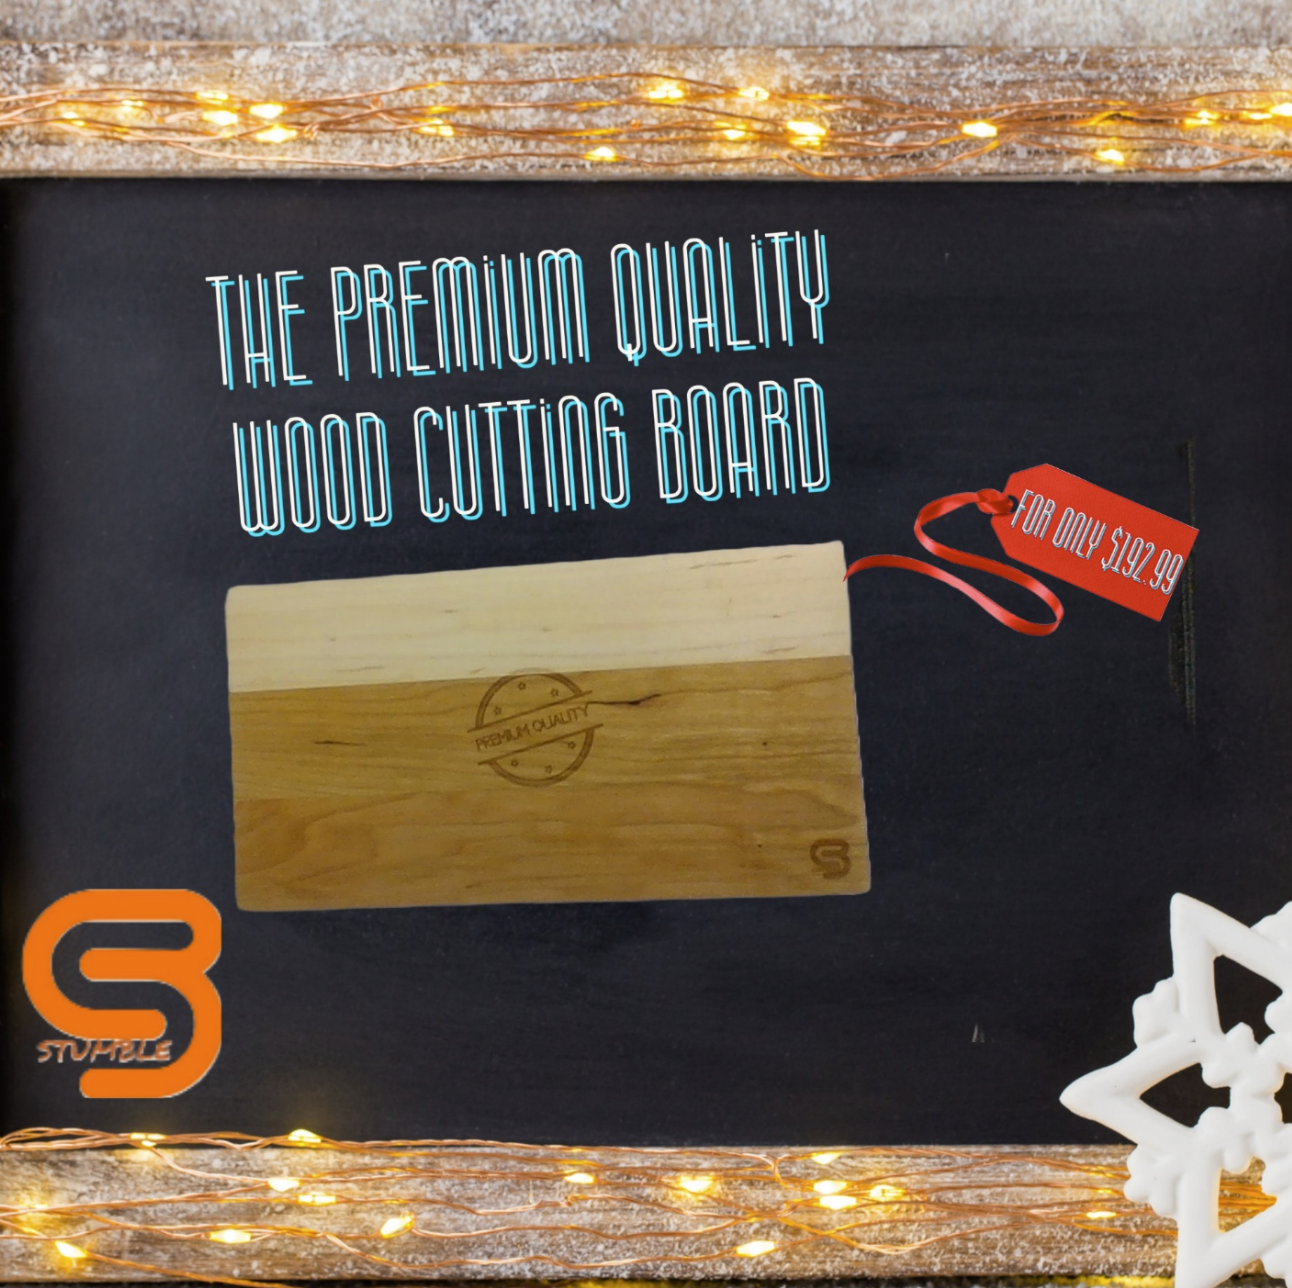
From here, students will be design their own themed cutting board. I was able to get a bulk order of 5"x8" bamboo cutting boards for the class from Amazon. Students will design a PNG in ACCE and we will use the laser cutter to etch the design. Their logo will go on the back. Once they have created their cutting board, they will need to create an ad for it. Here is my example,


One of the things I trying to do this year is not make my examples over the top. I spent lots of time on other examples in the past and I had students say they would not be able to match my example. I think that impacted their effort. For first time project examples, I'm going to scale back the examples until I can use student examples. 

All of these examples and projects will live in their portfolio on Seesaw. By the end of the trimester, I hope to have each student with a collection of their design work. 

Feel free to share some thoughts and ideas on how I could tweak this to make it better. I appreciate all of the feedback. 

Hugs and High Fives, 

N Provenzano

Monday, May 2, 2022

Ugly Stuffy Project #MakerEd

I've been looking for a new project for students this trimester and I was just at home thinking about the different things I wanted students to do. I knew I wanted them to make something with their hands, but I wanted to make it silly and ok if they were not "good" at it from the start. It was while I was watching Antman and the scene where he gave his daughter the creepy doll struck me. Ugly Dolls are are a thing and I think they can be a pretty simple project. I jumped online, found a bunch of videos on how to make these dolls and set to work ordering supplies and giving it a try myself. This has been a fun project because the Stuffys are supposed to look off and ugly. No mistakes, only features. Even in my demo I made that you can see below. I thought the fangs would be cool, but I made them too thin to sew and I didn't have the fabric glue. I pivoted and used excess fabric to make a mouth. It turns out I made plankton from Spongebob Squarepants, but I made him on my own. I just tasked the students with making an Ugly Stuffy, but I could give them more guidance and ask them to create a symbol of a feeling or something like that. There are lots of possibilities with a project like this. If you are looking for a project that will take a couple of days and get the students crafting with their hands, give the Ugly Stuffy project a try. 

My Steps - Made with Adobe Creative Cloud Express

Supply List

Poly Fil 

Embroidery Floss 

Scissors

Felt

Buttons

Needle Threaders

Glue

Large Needles

Students got to work and some had sewing experience and were able to help me and others do a better job. Here is a collection of photos from my Instagram account. 


Follow along on my instagram to see the Ugly Stuffys that students finish this week. 


 Hugs and High Fives, 

The Nerdy Teacher