Showing posts with label Your Starter Guide to Makerspaces. Show all posts

Monday, January 20, 2020

Contest! Win my books! #EdChat


Good morning! I thought I would do a contest for my new book, Beyond the Poster Board, that would give away my best selling books, Your Starter Guide to Makerspaces and The Maker Mentality.

The contest is simple,

1. Go to Amazon and purchase my new book, Beyond the Poster Board.
2. Read the book.
3. Write an honest review of the book on Amazon.
4. Screenshot your review when it goes live.
5. Tweet the screenshot making sure to tag me, add the link to the Amazon page, and the hashtag #BeyondThePosterBoard

A winner will be chosen at random. I will DM the winner and mail my other two books to you when the contest is over.

The contest will end on Sunday February 23rd.

Wednesday, September 19, 2018

Assessing Making #MakerEd #MakerMentality

The other day, I was doing a webinar for littleBits and I was asked a question I often receive when talking about Makerspaces.

"How do you assess the making that happens in a Makerspace?" This question and slight variations often come up because we are a system that can only understand something if it is assessed. For somethings, I understand the need to assess skills to see improvement. Assessing writing skills and reading skills can help a teacher better support a student in their class. If someone wanted, they could create assessments for soldering, wiring, coding, etc. Every aspect of a Makerspaace could be dissected and assessments can be created. However, that is the antithesis of making.

A Makerspace is another tool that students and teachers can use to accomplish different tasks. Project Based Learning and Makerspaces go so well together because the assessment in PBL is whether or not students demonstrated understanding of the topics assigned. They can do that through so many different parts of a Makerspace. The assessment given by teachers should not be about how well they used an LED or Raspberry Pi, it should focus on how well the students were able to demonstrate understanding.

Badging systems are in place in many spaces and we are looking to expand our badging system this year, but badges are in recognition of student skills, not an assessment. I know this might be semantics, but it is about the mentality of the makers that makes the semantics work. The benchmarks to earn a badge are there for students as they learn different skills. It is not something imposed on them with strict timelines. Students demonstrate their skills when they feel they have mastered them and they receive a badge to recognize that learned skill. No fear of failure or lowering of the GPA. They are learning because they want to learn.

If your focus is on how to assess making in a makerspace, you have lost what it is that makes a makerspace so special. It is supposed to be a place where anyone can come and explore design and creation without the fear of judgement. The minute you start putting assessment around making, you strip it of the purity of learning for learning's sake. With so many things assessed and measured, let's keep the makerspace free of archaic measurements and let people make in peace.

If you want to learn more about creating a specific culture around your makerspace, consider picking up The Maker Mentality to help make that transition happen. If you need to focus on building the space, then Your Starter Guide to Makerspaces is what you need. 

Friday, April 13, 2018

Project Based Learning Helps Makerspaces Thrive #MakerEd

There is more to a makerspace than the tools that are in there and the pre-packaged projects for students to explore. I'm not knocking pre-packaged projects. I love them and have some in my makerspace that are perfect for students. I'm saying there is more to a space than just those projects. To really get the most out of a makerspace and the investment of time and money that went in creating it, there needs to be consideration given to the instruction that is happening in the classes surrounding the space.

I've written about Project Based Learning before (here and here) and have always been advocate of bringing it to as many classrooms as possible because of how positively it impacts the students in my classroom. When I took the leap to bringing a makerspace to my last school to enhance PBL, it was the best decision I could have made to support it. You see, a makerspace is about the tools that allow people to explore and express their ideas. That is what PBL is all about as well.

One of the best parts about the makerspace I have been helping build with the students and teachers at my new school is that it has started to make an impact on the lessons in the classrooms. It has been fun to see teachers explore the makerspace and see how it might influence their lessons. Right now, the 8th grade science students are gearing up for their end of the year project and the makerspace is primed and ready to support them and their work. It's the support aspect that I think throws some people new to the areas of project based learning and makerspaces.

Makerspaces are not designed to magically make STEAM connected to all content areas and for students to start designing using 3D software. There will be some students that are drawn to the space and will explore the different tools, but most students will not just venture to the space on their own without a specific goal in mind. Like many things that are popular in education, makerspaces is seen as a silver bullet to bring up scores in STEAM areas and create smarter and more creative students. That, of course, is nonsense. A makerspace is a tool that needs to be used to support sound instruction. (Shocker!)

To truly get the most out of a makerspace, there needs to be a culture of project based learning in the school. When you have a culture like this, having students and teachers in a makerspace will be a natural extension of PBL. With PBL, creating something to demonstrate understanding is part of the process. The Maker Mentality is already there for students and the makerspace provides them with the tools to dive deeper in different ways. Whether in Language Arts, Social Studies, Maths, Science, or a Language class, if students have become comfortable with the PBL model, they will be comfortable using a makerspace to create things that can help them demonstrate understanding in their various classes. It is tough to think about, but a makerspace is one large tool, filled with smaller tools that support student and teacher learning. It is the perfect tool for project based learning.

I made sure to have a full section on Project Based Learning in my makerspace book because it is important to get the idea out there that a makerspace is perfect to support this instructional model. There needs to be time dedicated to see how instructional practices can be be changed to allow students and staff to get the most out of the makerspace that goes beyond the pre-packaged units. When this happens, an entire school can be transformed and the culture of learning will be better than before.


Tuesday, February 13, 2018

Making Room for Cardboard #MakerEd

I was working in the Makerspace yesterday and a group of regulars came in to continue to work on an impromptu project. a few 6th graders saw a couple of large empty boxes that were just sitting in my room. They were the boxes for a couple of Inventables Carvey CNC machines. I was excited to receive these new machines because some students expressed an interest in design that went beyond cutting poster board and really wanted to explore what could be possible with different tools.

The Knight's Forge, our Makerspace at University Liggett School, was a messy delight as these students decided to take the big boxes and make houses out of them. They saw boxes and immediately decided to make houses. Here is a shot of the building process,

A post shared by Nicholas Provenzano (@thenerdyteacher) on

Three different students have come together on their own to design and build a box home. I sat back and watched as they problem solved on how to make a roof and then how to make the room have a point to give them head room. They cut out a circular, Hobbit-esque, door into the side of one box and then did a matching one on the other box to connect the two. Everyone did their part and just had fun building. During the build, a student turned to me and said,

"I bet your annoyed that we are using cardboard instead of all of the technology in the room."

My immediate response was that a Makespace is for making anything using whatever you want and that I LOVED that they were just using the cardboard in the room to create something amazing. The tools are available for whatever type of project you want. The student smiled and went back to designing his roof, but I felt bad.

Reflecting is something we should all do, but try to avoid because it can sometimes give us a hard truth that we do not want to face. However, with reflection, we can grow and become better for ourselves and our students.

The Knight's Forge has started to fill up with different types of technology because of a grant I wrote that was supported by CTN and Detroit Public Television. These new tools will offer students and teachers the opportunity to explore project based learning in ways not possible before. Independent student projects will have more options now because of these tools. After reflecting on the student comment, I realized that there needs to be equal conversation about the analog tools that are available to students and teachers in the Makerspace. It is something I believe and have shared before, but it is something I need to be more vocal about in my setting. Just because I know it and think something is obvious, doesn't mean that others do. This is something I know I can do better and will moving forward.

As an inspiration, I generally turn to Colleen Graves and the amazing things she is doing in her library. Here is a short video from Instagram of students creating with cardboard.


A post shared by colleengraves.org (@makerteacherlibrarian) on

Colleen takes some cardboard, adds a Makey Makey, and the creativity explodes with the students. If you are exploring Makerspaces, it is important to make sure that there is room for great tools to support a wide range of creative interests. Don't forget that cardboard can take students on amazing rides with their imagination.

Students in 6th grade Math are working on their own Scratch based arcade games and some are going to build controllers for their games. Cardboard is a perfect place to start the design fun. Here is my Makey Makey cardboard controller creation.


I hope my misstep and reflection helps others as they look to explore making in their own spaces. Learning is a lifelong adventure and I'm glad I have a place and community to share the ups and downs. Have an amazing day everyone!


Saturday, November 11, 2017

Are We Asking the Correct Questions? #EdChat #MakerEd #MSChat

I'm always thinking about questions. Not just the questions I get throughout the day, but the questions I ask students and my own son.

"What did you do today?" This is the most common questions I ask my son, but I know it is the wrong questions. I need to make sure I ask, "What did you learn today?" This question leaves open so many possibilities for him. He could talk about so many different things. Asking him what he did will limit him to actions performed, not ideas created.

This is the same idea I'm trying to bring into the Knight's Forge Makerspace at University Liggett School. Is the correct question, "What do you want to make?" or is it "What do you want to learn?" I ask students what they want to make, but I feel like I have it backwards. I should ask them what they want to learn and then help them find the tools that best support their goal.

The realization struck my yesterday when a student came in and he said he wanted to learn how to make music using code. He was focused on learning to do something, not just accomplishing something. I think that is a very important difference that people, me included, sometimes miss when want want students to create. Is it just the act of creation that we want, or is it the act of learning. If it is learning, shouldn't we frame makerspace better if that is not the message out there.

I don't have the answer to these questions, but they are questions that are bouncing around my brain and I thought I would share them here for all of you to think about and hopefully share your thoughts.

Hugs and High Fives,

Nick

Sunday, October 15, 2017

Who Run The World? #STEAM #MakerEd

I was working in the Knight's Forge getting things ready for students who were buzzing about the space and I just looked up and this is what I saw,

A post shared by Nicholas Provenzano (@thenerdyteacher) on

I am sure I had the biggest smile at that moment. The girls were moving around, exploring coding, 3D design, physical computing, and Minecraft. They were helping one another when they got stuck and everything  was awesome.

For me, I wanted to make sure I created an environment that was welcoming to all students and I have plenty of work to do moving forward, but this is a good start.

I'd love it if more people shared photos of their ladies working in Makerspaces to show that these are spaces for all students interested in exploring new ideas and Making things that Matter to them.

Please tag @TheNerdyTeacher and @uniliggett with pictures of your girls making so I can share it with my girls.

Hugs and High Fives,

NP

Friday, October 13, 2017

Making in the Middle #MakerEd #Badges

Our makerspace, the Knight's Forge, is in complete disarray after school...and I couldn't be happier about it.


One of the part of my amazing job at University Liggett School is to build a Makerspace for the students at the Middle School level. While this is a school that is project based and student driven, the Maker Mentality had not been explored fully. I wanted to really create a space based on what the students wanted to do and help them show off what they learned. After going back and forth over where to start and what to do, I settled on Minecraft and Badges!

I spent time talking with students and found that many of them were into Minecraft and I figured that would be a perfect place to start. I dove in and started creating badges and skills students needed to master to earn the badges. Here is a one of the badges I created, the Level 1 Minecraft Badge.

Students were pumped about the chance to earn badges and jumped at the chance to get started. I had 6th through 8th grade students reaching out to me to sign up to use the Makerspace during their study hall. Quickly, I found myself in the great problem of not having enough space for all of the students who wanted to Make!

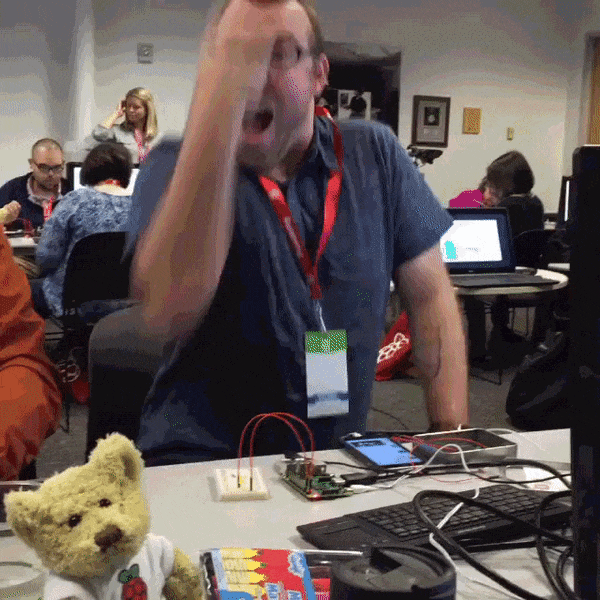
There were still students who had not come to the Makerspace because Minecraft was not something they were excited about doing. So, I talked to students and the idea of coding seemed interesting, but I did not want students to just sit in front of a screen. I wanted them to explore physical computing like I did when I went to Picademy. I recreated some of the hardware that Matt Richardson and the North American Raspberry Team created for the World Maker Faire so my students could get their hands dirty. Based on Matt's original designs, I added a Motion Sensor and a Light Sensor.


I only have three kits set up for the students to use for the physical computing, so I had to create a waitlist! I never thought I would have this much excitement for the new space.

As word spread about the different things students were doing in the Knight's Forge, more students showed up to see what was going on in the Makerspace. Soon, students started to explore 3D design on Tinkercad and have started to design items of their own.


I have not even had a chance to dive into littleBits, Sphero, Makey Makey, and other great tools because I am just swamped. Kids are flocking to the space, but I wanted them to explore more on their own and create something new instead of just following directions. I wanted to install that Maker Mentality aspect of exploration. To do that, I asked if anyone in the Middle School wanted to help create gadgets to protect against the zombie apocalypse.

Raspberry Pi has a Pioneers program for Middle School students that gives kids a challenge and a set time to accomplish it. Sadly, the competition is not currently available in the US, but I figured that didn't mean we couldn't build cool things. After sharing some tweets, I connected with a school is Mass. and we are going to support one another as our students explore the different projects they create using a Raspberry Pi.

I had two groups form right away and start brainstorming on what different types of gadgets they could create. They were driven to explore different sensors and the code needed to learn how to use them. The students have until December 22 to create their gadgets and the guides on how to build them. My budget is tight, but I might have to start a 3rd group because the project is very popular.


Multiple students have come in to earn their LED, Button, Buzzer, and Motion Sensor badges and that leads to more students wanting to do the same thing. I am a bit overwhelmed because I haven't had time to print the sticker badges and set up the digital portfolio aspect of the badging system.

I have a great problem that I'm too busy and I don't have enough supplies for everyone. This is way better than sitting in the Makerspace after school with a very sad look.

All of this is possible because of everything I learned in building my first Makerspace. I'm avoiding the mistakes and have the pulse of the students body. More students want to make and explore what is possible. Not because they want to play with new toys, but because they want to explore and learn new things.

If you are thinking about creating your own Makerspace, check out my book, Your Starter Guide to Makerspaces, and drop me a line if you have any questions. I'm happy to help in any way that I can.

Hugs and High Fives,

NP


Sunday, September 10, 2017

Tips for Kicking Off Your Makerspace! #MakerEd

I'm really excited about the opportunity to build a new Makerspace at my new job at University Liggett School. After learning so much from my first experience building a space in a library at a high school during my former job, I feel like I have a great opportunity to really create something special with my students. For those that are interested in starting your own Makerspace this school year, here are some tips that can help you on your journey.

- Talk with your students

As an educator, it is important to have a conversation with your students to address many important questions. The most important is, "What do you want to make?" This needs to be the driving force behind every decision moving forward. If you have students passionate about code, look at various coding tools. Some students might be interested in the learning space aspect of a Makerspace and have ideas regarding the environment. These conversations will help direct the path of designing a Makerspace.

- Find the funds

This step might be optional depending on your situation. If you already have money from your district. then you do not need to worry about this step at the moment. If this is a solo project and your district/school cannot offer much financial support, grants will be needed to make your space happen. Look at state and local groups that offer grants for schools. You might find one that supports STEM/STEAM projects that would be perfect for your Makerspace. Another approach is to reach out to local businesses who might be interested in sponsoring specific purchases for the space. Sometimes businesses feel more comfortable giving money to a specific item instead of a blanket donation that might go to anything. It never hurts to have the students work on presentations to make to these groups. It is much harder to say no to students.

- Prioritize you wants and needs

Once you have the idea of all the different things a student wants in their Makerspace, it is important to prioritize everything. Placing items in a "Want" and "Need" category is a nice way to see the importance of various requests from the students. You should have a fixed budget that will help determine what is a need and a want. You might find something is a want that is outside the budget, but you could have an different grant purchase it or a specific business that might want to donate to help you purchase it. One thing to keep in mind as you develop your list; establishing a solid base for your Makerspace can help you later on when you write more grants or ask for support from your school district and community. Sometimes it takes a "proof of concept" model to show that the space is viable and worth the money.

- Reach out to the Internet for ideas

Do not be afraid to reach out to amazing experts out there who have helped build Makerspaces in their schools. Colleen Graves and Diana Rendina are excelllent resources when it comes to Makerspaces. It is always great to connect with other educators to see what has worked and not worked for them. The #MakerEd community is filled with great people looking to help those interested in providing students with an opportunity to grow through the use of a Makerspace.

- Document your journey

It is important to document your journey when creating a Makerspace. This comes in handy in a few different ways. First, it can be used to show granting institutions, administrators, and local businesses  how their support has impacted the space. Secondly, the documentation can be used in future requests for funds. They can show a "proof of concept" idea where you tell different groups that you would be able to do even more if you had more funds. Lastly, it is fun to have portfolio of the different things that students have made over the course of the year. They can really see how their projects came along over the course of the school year.

- Be OK with failing

Set the standard with your students that there are going to be times in this new space where things are not going to go as planned. Despite all of the planning, failure can happen and students AND teachers need to know that is OK. This allows everyone to feel comfortable taking risks and trying new things. We want students to explore areas they are passionate about and their might be a risk of failure. We do not want that fear of failure be the reason that a student does not try something. Tons of great learning will come from these failures.

These are some good starting points for building a Makerspace. (Shameless plug) I have more detailed and nerdy suggestions in my book, Your Starter Guide to Makerspaces. This book is filled with my experience building a space and nerdy analogies to help make connections. It has been used for book studies and was a best seller on Amazon. If you are interested in purchasing any books for your district, email me and we can even get you a discount!

If you have any questions, please reach out to me and I will be happy to answer any questions.

Hugs and High Fives,

Nick

Monday, August 21, 2017

#MakerMonday with @HueHD #MakerEd

Happy #MakerMonday everyone! I wanted to start something on my website to support those educators that are always looking for cool things for their library or Makerspace. 

A Makerspace is NEVER driven by stuff. A Makerspace is ALWAYS driven by people. The people that are part of the Makerspace community should decide what is in there based on their interests. If you are an educator looking to stock a Makerspace, I hope you have talked to your students first and asked them what they are interested in making. That should be what guides you in making your purchases. 

Contest!
You have a chance to get a copy of my book and a Hue Animation Studio kit! All you have to do is tweet a picture of something you've made to @TheNerdyTeacher and @HueHD with the tag #MakerMonday by Sunday August 27th for a chance to win. The winner will be chosen at random. If you have any questions, please tweet @TheNerdyTeacher. Thanks and good luck!


Featured: HUE Animation Studio.

What is HUE Animation Studio?

"HUE Animation Studio is a complete stop motion animation kit which includes the HUE HD camera, a single license for HUE Animation and the HUE Book of Animation"

Personal Thoughts:

I've had HUE Camera for a number of years. It has been an excellent camera for my computer when computers did not come with a built in camera. Then I heard about the Animation Studio and had to play with it. My students had done stop motion projects in the past and I thought this is something that would be nice in the Makerspace. I sat down and dove into the software and this is what I created in 20 minutes.


This was so much fun! If I had more time, I would have done an entire Simpsons scene with voices and everything. I could download audio as well and import it into the video if I wanted the theme music playing or actual character voices.

Extras:

The kit comes with a Book of Animation that walks the users through various projects. One that I will try at home with my son is the melting Ice Cream. Time laps photos of melting ice cream and played in reverse is a cool effect of having ice cream born from a puddle of goop. Lawn Skating is another fun project that will get you outside to take some fun videos.


Hue Animation Studio was such an easy program to pick up and use. I did not read any of the directions and the UI was very intuitive. I took the pictures, added the audio, exported the video, and uploaded to YouTube. I only needed a laptop, the kit, and someplace to point the camera. For only $70, this is a great deal for a camera and the software. If you are looking to add a but of animation to your classroom or Makerspace, you have to check out the HUE Animation Studio. You will not be disappointed. 


Wednesday, August 9, 2017

The Case for Kits #MakerEd

There is a point of view that kits are not good for Makers/Makerspaces. Their is a belief that kits take away from the purity of exploration of a Makerspaces and trying new things and failing. One big question from these people is,

Are you truly Making if you are just following directions?

My answer to that is yes. A big, fat yes for that matter.

I love starting my learning with kits. If I want to tackle something completely new and have no idea where to start, I will order a kit so I can get my bearings. After going through the motions with the kit and understanding what everything can do, I start to branch out and explore my ideas based on what I've learned. That is the beauty of kits. They are the gateway to more in-depth making.

I get very frustrated that there is a "my way or the highway" approach to Making and Makerspaces. Not everyone is going to follow the same path when it comes to Making and that should be embraced and supported by all educators. Our students are not starting in the same place, so why not offer them a kit or challenge to help guide them on their journey. I think it is called differentiation.

Companies (littleBits, SparkFun, Pimoroni, PiSupply, etc.) offer a simple access point to complex electronics that might be too intimidating for beginners to explore on their own. I appreciate any company that wants to try and make STEAM concepts more accessible to a variety of learners. Can these kits be pricey? Yes, but getting all of the pieces for various projects and creating the guides for them are not cheap and a person is paying for the convenience the kit provides.

As a Maker community, please let us be kind and supportive of all learners, adult and child, that are trying to explore the creative world around them in ways that work for them.

Hugs and High Fives,

NP

Wrong kit. This is K.I.T.T.

Tuesday, August 8, 2017

It Started With An LED #EdChat

One of my most exciting moments in the Maker world was when I made my first LED blink at Picademy. I was playing with a Raspberry Pi for the first time and I had no idea what I was really doing. I was following the directions and trying to keep up. Then, I made the LED turn on and then I made it blink. Here is how I felt about it,


From that moment, I was hooked. I had the itch to keep learning and to dive deeper because of that experience. I am not sure if the blinking LED was supposed to be the skill that hooks a Maker, but it hooked me. I think this needs to be kept in mind for teachers out there. 

We want our students to explore the world around them to see what they can learn and love. We do not have any idea what will be the lesson, book, comment, or idea that will set them off on a journey of discovery, but we need to make sure we give all of our students an opportunity. 

As the school year starts, there will be plenty of time to focus on the curriculum that needs to be covered. I hope as educators, we think about the experiences we want to create for our students. Those are the things that can alter their trajectory for the rest of their life. For me, Picademy launched me into the world of Raspberry Pi and Making that has led me to great learning and sharing with a passionate community. That has allowed me to connect with my students and pass the awesomeness to them. Life is made up of experiences and school should be designed to give students the best learning experiences possible. 

What experiences do you want your students to have this year?

Monday, August 7, 2017

#MakerMonday Featuring @SparkFunEDU micro:bit Kits

I’ve been seeing micro:bit on the Internets for months now and I even own a few, but I have not found the time to really dive in and see what I can do with it. Sometimes, I like to just dive in with a device and see what I can hack together, but other times, I like to use a kit first so I can get an idea of what is possible and go from there. SparkFunEDU has the perfect kits for learning all about micro:bit and they are the feature of this week’s #MakerMonday.


I spent time playing with the SparkFun micro:arcade kit, micro:bot kit, and the micro:climate kit and I loved them. I am going to focus my thoughts on the micro:climate kit for the purpose of this #MakerMonday, but here are some quick thoughts on the other kits I played with from SparkFun.


Feratured: SparkFun


Focus: Electronics


Grade: All Ages


What is SparkFun:


“We’re here to help you start something.”


I love this line on their About Us page. It says so much about the Maker Mentality as I see it and how companies can support students and educators looking to open up to Making. They are here to help us get started and that is exactly what the micro:bit kits do.


Personal Thoughts:


Quick Thoughts on the micro:bot and arcade:bot kits:


The micro:bot kit was a fun build, but a little more complex than I expected out of the box. I have a good feeling it was my own fault because I tend to rush and can skip a part of the directions because of that. Once I got everything together and uploaded the coded provided, everything was awesome. It was cool to watch the bot roll around and change directions when it hit an obstacle. Following a black line is fun for a bit, but it is just a start to more complex coding fun anyone can have with a bot.


The micro:arcade kit is great for those looking to get started with gaming projects. I have already built varied projects that involved joysticks and found this to be very easy to assemble and use with an online game. Connecting this to a Raspberry Pi and playing RetroPie games is a fun starter project for those that are looking into starting small for their gaming projects.

Deeper Thoughts on the micro:climate kit:


Out of the box, the micro:climate kit has everything you need to assemble a weather station to get tons of data. When I was opening the package, there was a weather system moving through in 30 minutes and I wanted to get this put together and on my deck as soon as I could.


Here is what I was able to assemble and code in that window.


Here is another video I posted on Instagram. 


A post shared by Nicholas Provenzano (@thenerdyteacher) on


I was able to assemble the entire kit and mount it in place before the first drop hit. Once the sky opened up, I was able to see the the data on the bit LED matrix. The wires are long enough to come into the house so I could keep it dry for a longer period of time, but a simple plastic bag worked just fine. Long term, I see myself building a case for it to stay outside. More 3D design in my future.


I was connecting the micro:bit to my computer and changing the code, but that is not a very practical option if the bit is going to stay outside and is in a case of some sort. So, it made sense to me to hook it up to a Raspberry Pi 3 that I could VNC into and upload the new code as needed. (Note: I tried using a Zero W, but it was just too slow to do the things I wanted.)


I was able to combine some code that was provided by SparkFun and have the bit provide me with Temp and Wind Speed. It took some tweaking to convert the C to F, but I was pretty stoked when I was able to code it and get it to work. Sometimes it is the little success that really drive me forward, not just the big ones all can see.


The SparkFun website has a great manual and really guides the user though the creation of each possible project that can be made using the kit. They have direct links to the code that can be downloaded and added to the bit. This made using the Pi remotely so much easier. I just downloaded and uploaded in under 30 seconds and the bit was working.


Extras:


SparkFun is filled with amazing kits and pieces of Maker goodness for all interests. It is worth checking them out when you are in need of conductive thread, alligator clips, or any other supplies to help you get started with your project.


Final Thoughts:


I loved the kits and see exactly how they can fit in a Makerspace, but also how they can fit directly into any STEAM program. Almost all grade levels have some type of climate unit that the micro:climate kit can be used. The level of data collected will be dependent on the skill level of the students, but the teacher can modify as needed with this kit.


The micro SD board in the micro:climate kit that allows the user to store collected data directly to the bit is great for research. Students just need to grab the card and insert into a computer to get the data they need. SparkFun walks the user through the process as well.


The soil temp sensor and the moisture sensor are great add-ons to the bit that will continue to provide information to the user. Connected to a Raspberry Pi, I can see the camera module set to video or time lapse used along with the micro:climate kit to pull in a host a data that would fit perfectly in a multimedia presentation sharing important data points with class.


If you are looking for a diverse set of kits for your classroom, library, or Makerspace, I highly recommend checking out the micro:bot, micro:arcade, and micro:climate kits. Their diversity of application makes them perfect for K-12 STEAM exploration in and out of the classroom.

Friday, August 4, 2017

An Underwater Pond Camera with @Raspberry_Pi #MakerEd


I was out back and I was looking at my pond like I usually do most Summer days. Here is a shot of my pond. I built it all by myself. One of my earliest adult Maker projects. 


As I walked by and noticed how clear my water had become since changing filters, I thought it would be cool if I could see where my fish like to hide. I broke a few large Terra Cotta pots in half and placed them in the pond to create little caves for the fish to hide from raccoons and a white crane that hangs in the backyard. I immediately that that a my Raspberry Pi Zero W attached to my Dremel 3D printer would be perfect for this project. Here is a link to elinux.org site that walked me through the code to create a Web Interface for my Raspberry Pi Camera

Since I had the program up and running already, I needed to come up with a to power the Pi and to keep it dry. After a quick run to the store for some Diver grade waterproof bags and battery pack, I was ready to put together my underwater Pi.


These are some photos of the camera in the bag with the battery pack. I also added this little LED light. I think it helped a bit.


Here is the bag floating on the surface of the pond getting some great shots of the fish swimming around. If I wanted, I could weigh the bag to the bottom of the pond (3.5 ft), but I'm not sure the wifi signal would be that strong.

Here are a couple of videos I posted to Instagram. (Note: Ignore the Time Lapse stamp. I forget to change that before recording.)

A post shared by Nicholas Provenzano (@thenerdyteacher) on


This entire project was easy because I had a Pi set up for video and timelapse. I just needed to take it and make it waterproof. This was a fun project that I can really explore more deeply by thinking about building a motorized boat around the floating bag that would allow me to steer it around the pond to specific areas and get really tight shots.

Hugs and High Fives!

NP

Wednesday, July 26, 2017

Don't be a Makerspace Negative Nelly #MakerEd

One of the things I have always loved about the Maker Movement was the diverse community that loved to share their ideas. I felt very welcomed by many different people that supported my exploration of Makerspaces and helped point me in the right direction if they couldn't answer my many questions. Now, I have teachers coming to me with Makerspace questions and I return the favor. It truly is an important part of the Maker Movement. However, every community has its Negative Nellies.

There are many different approaches to starting Making in your school or classroom. Some might have admin buy-in and the money to dive in and buy tons of goodies for a space. Others might not have that support and are trying to stretch their budgets to support student-led inquiry. Some educators might have an excited student and teacher base begging to get their hands dirty in a Makerspace and others might have a small group of interested students and a resistant teacher base. All Makerspaces are not going to be built the same way for the exact same reasons. That is OK!

I'm asking educators to ignore those people that insist that the way that you are doing Making or Makerspaces incorrectly. Ignore the people that are adamant that the approach you are taking is wrong and the only way to truly create Makerspaces is to do it exactly as they tell you on Twitter, in their books, on their blogs, etc. There is a big difference between sharing your ideas on how Makerspaces work for you and telling others they are wrong. I've written a book and I think the way I went about setting up a Makerspace is helpful information to those interested in starting their own space, but I do not pretend to have all of the information. If I don't have the info, I will point educators to some of the amazing Maker Educators out there. (Note: This is not all of the awesome people out there. I'm constantly adding people and companies as I interact with them. So, don't be upset if you are not on there. I'm sure it was an oversight or a fat thumb issue.)

I've seen crazy heated conversations erupt over LEGO walls and Makerspace Challenges. Personally, I think having a LEGO wall where kids can just build and do silly things is cool, but I do not know I would put it in a high school Makerspace. Maybe they would love it. I hoped if I did decide to try it, I would get support from teachers and not blow-back on how I'm not creating a "real" Makerspace. I love the idea of challenges and think that it could be a nice component of a Makerspace. Some students are not sure where to start, so a pack of challenges that encourages students to explore different aspects of the space would be a nice way to introduce different Maker ideas to various students. It should not be the only way a student is allowed to interact with a Makerspace, but one element of it. Every Makerspace is designed to be different and each educator needs to keep that in mind while they building one and before they criticize one. 

Lastly, the Maker Mentality is the most important thing educators want to see installed in their school. With the right mentality, every space can become a Makerspace. I think many educators realize that, but you have to start somewhere. Sometimes the environment is ripe for an entire part of the library to be a Makerspace and other environments need to start with a cart that goes from class to class to support specific teachers ready to embrace the idea. Again, every school and educator is in a different place and they are all working to bring the tools, skills, and mentality to their students. These teacher has the best intentions for their learning environment and they, like all of us, will make mistakes along the way. Trashing their attempts to provide these opportunities to students is not helping and truly antithetical to the Maker Mentality. 

Try something new, see how it works, iterate if it fails, look for support from the community, and try again. Repeat as needed.  

Why should creating a Makerspace be any different? 


Sunday, July 9, 2017

The Path to PBL and Making in the Classroom #MakerEd #PBLChat

I've always thought that PBL lead very naturally, for me, to Making and Makerspaces. As I thought more about it, the two concepts can both be approached the same way in the classroom. That is good and bad though. There are approaches that some call PBL or Making, but fall a bit short for me. There are three steps to PBL and Making that should be explored by educators looking to introduce these practices in the fall.

Step 1: Teacher Controlled

Project Based Learning

Having student create exactly what the teachers has asked for is Teacher Controlled PBL. It is not true PBL. It is having students follow a recipe and just being compliant. Very little creativity is allowed or needed to complete the task.

Making

Having students work in a Makerspace creating exactly what the teacher has asked is not true Making. It is follow directions and doing as they are told. It's not very fun and the students might appear engaged, but they are just going through the motions.

Step 2: Teacher Influenced

Project Based Learning

This version of Project Based Learning has the teacher putting some constraints on the project or adding specific aspects that must be addressed in the project. This is closer to pure PBL, but the teacher still has too much say in the process.

Making

Teachers sometimes put out tasks or ask students to complete projects with broader guidelines in the Makerspace. A teacher influenced Maker project is close to pure Making, but it still has too many teacher fingerprints.

Step 3: Teacher Free

Project Based Learning

The purest form of Project Based Learning is Genius Hour/20 Time. This is the purest form to me because it allows the student to choose what they want to learn and how they are going to demonstrate what they learned when they are done. The student is in full control of their learning from start to finish and the teacher provides whatever support the student might need along the way.

Making

Pure Making is exactly the same thing. Word for word, it is the same. Students use the Makerspace to explore their passions and share what they have made and what they learn in ways that work for them. The teacher acts in a support fashion if needed.

I want to stress that Step 1 and 2 are ONLY bad if that is the only way that PBL and Making are approached. If educators stop and Step 1 or 2, the students are not getting a full PBL/Maker experience. Teachers should start with Step 1 and model the process of creating the project with the students. Next, Step 2 allows the students to see how choice can come into play for projects. Lastly, Step 3 allows the students to explore learning on their own and the teacher provides support as needed.

Like all things in education, this is not the end all be all approach to Making or Project Based Learning. This is what I've noticed over the past few years of using PBL and Making in my classroom and school. Do you have something to add that I missed? Is there another step? Share it in the comments.

Hugs and High Fives,

NP

Tuesday, June 6, 2017

It's Not Just The Space, It's The Mentality #MakerEd

This week has been a whirlwind of writing for me. This will be a third post in a day that should go out on Tuesday or Wednesday. I've just been inspired to write. Also, I've finished my grading and finally have time. :-)


I've been thinking about Makerspaces lately and the role they have been playing  in my educational adventures. I have been advocating for schools to look into Makerspaces as a way to promote this creative spirit. I believe that a space can help support ideas that students have and can draw reluctant learners in to try new things, but the mentality needs to be the focus. I started to think really hard about what makes up the Maker mentality to me. I'm sure there are people that have come up with a list of things that define the mentality, but that does not apply to everyone. Making is about creating your world and I think that includes what the Mentality is for you and your learning community. Here are some things that I think make up my Maker Mentality:


1. Be a Risk Taker - Be willing to try new things that are completely different for you. Don't be afraid of what might happen or how it might end. Take those risks and do it with a smile.


2. Be Fearless - If you are going to take risks, you need to be ok with failing. The bigger the risk, the bigger the potential failure can be. Don't let fear be the blockade. Go for it and try again if you fail.


3. Be Passionate - If you are going to do something, give it your all. You will only let yourself down if you are not willing to commit all of your being to pursue what matters in the world. If you are going to Make great things, Make them with the passion found only in your heart.


4. Be Inclusive - Making is for all people all of the time. People can only be as great as the community they surround themselves. Different cultures, life experiences, ideas, and so much more can drive you to create amazing things.


5. Be a Hacker - Take things and think of different ways to use them. Remix and remix and remix again until you create something new and beautiful. Some of the best things in the world have been created by just changing things that already exist.


6. Be an Artist - We are all artist, we just use different mediums. A wired Raspberry Pi that will send you weather updates is a work of art to you and those who can appreciate the work that goes in. The Arts are part of STEM and you are the artist. Your creations make the world a more beautiful place. Never forget that.


7. Be a Dreamer - Dream big and dream often. Then take those dreams and make them a reality. If you want to remix the world, you need to dream it before you do it. Your dreams are only limited by your inaction.


8. Be True - Most importantly, be true to yourself. Making is about expressing feelings and ideas in ways that are meaningful to you. Stay true to that person, but be open to change and growth. A Maker will grow and become something different if they are open to the community. As long as it is true to who you are, everything will be just fine.


I'm sure others will have ideas that are different than this, but these are things that are meaningful to me and have become a part of the Maker Mentality with my students. Below is a quote that hangs above my door that really encompasses much of the Maker Mentality for me.


If you want to know more about setting up Makerspaces for your district, school, or classroom, please email me, pick up my book, Your Starter Guide to Makerspaces, on Amazon, or send me a tweet. 

Sunday, May 21, 2017

Your Summer of Making #MakerEd #EdChat

When school is out, there is nothing better than just sitting back and relaxing without having to worry about school or the classroom for 2 full months. Said no teacher ever. 

Summertime has always been a time for teachers to explore new areas of learning and see how they might impact their classroom, school, or district. I have taken the Summertime in years past to learn how to use Raspberry Pi, play with Arduino, and have fun with robotics. It has been a perfect time to explore areas that interest me without the pile of paperwork I receive as an English teacher. 

For educators out there looking to dive into Makerspaces, but have not had time to do so in the school year, than I would encourage you to check out my book. I know it is a biased suggestion, but the response I've received from teachers around the world has been amazing.

Educators have picked up my book to start their Makerspace journey and shared great stories. Schools and entire districts have used my book to help guide them as they bring Makerspaces to their educational environment. 

Here are just a few things people have said about my book:

I've never had so much fun reading a professional book, ever. Somehow each chapter is equal parts hilarious, gleeful, inspiring and practical. I would recommend to this every educator I know and even parents and students. This is a book you can come back to again and again to laugh learn and make each time in a new way. - Jennie Magiera, Educator and Author of Courageous Edventures

"Nick Provenzano has written an awesome guide to 'making', that not only makes it accessible to everyone, but is an awesome and fun read. His mix of personal anecdotes tied into powerful examples of how to get started and move forward, make this book an awesome addition to a collection for all educators, not just the ones looking to start a 'make space'. Awesome read!" - George Couros is the author of "The Innovator's Mindset", and a global Innovative Teaching, Learning, and Leadership Consultant.

"Interested in STEAM education and even starting a Makerspace in your community, then this book should be on your reading list! Whatever your subject specialism it will give you new perspective on your lessons and maybe even get you thinking a little more nerdy." - Carrie Anne PhilbinDirector of Education at @Raspberry_Pi, Author, @thePSF & @CompAtSch board member, Founder @GeekGurlDiaries, Chair of @CASinclude, Google Certified Innovator

"Nicholas is a pioneer. His experience, enthusiasm, and good humor make this book a fun and indispensable resource for fostering meaningful making in your school." - Matt RichardsonProduct Evangelist

If you have any questions about my book, Your Starter Guide to Makerspaces,  or anything Maker related, do not hesitate to reach out to me on Twitter or email. There are bulk discounts available for 20 or more copies, so please email if you would like to get a set for your school or district.