
Post 1:
Meaningful Making Through Project Based Learning
Hello, world! Welcome to the first in a series of posts designed to explore the impact of Project Based Learning through the lens of Makerspaces. This is possible thanks to a grant from CTN and through a partnership with Detroit Public Television, The Nerdy Teacher, the University Liggett School. Over the coming months, these posts will explore the different ways students, teachers, administrators and parents can support project based learning in the school environment and at home. First though, here is a little bit about me.
I have been in education for the past 16 years. I spent the first 15 of those years as a high school Language Arts teacher where I focused on project based learning as a main way to assess students. During that time as a classroom teacher, I was recognized by Michigan’s Association of Computer Users in Learning as the Technology Using Teacher of the Year and, in that same year, by the International Society of Technology in Education as their teacher of the year. I present around the world to schools and at conferences on how to best approach integrating technology and teaching practices into their classrooms. My work with project based learning has been covered on CNN and my use of technology has been featured in the Ed Week and other publications around the world.
Over the past 10 years, I have become a Google Certified Educator, Raspberry Pi Certified Education, TEDEd Innovative Educator, was recognized as an Emerging Leader by ASCD and earned my Masters in Educational Technology through Central Michigan University (Go Chips!) In 2016, I published the best selling book, Your Starter Guide to Makerspaces, that shared my experiences of starting a makerspace to support project based learning in my school. My new book, The Maker Mentality, was released in June and was a new best-seller in STEM books.
In 2017, I started my new position as the Middle School Technology Coordinator and Makerspace Director at University Liggett School where I was tasked to build a Makerspace and program to support making and project based learning for students in grades 6-12. It is an exciting new adventure that will will be the source of many of the posts coming over the course of the next year.
You can follow me on Social Media on Twitter @TheNerdyTeacher and Instangram @TheNerdyTeacher. I am also a father of an amazing 1st grader, husband to a very patient wife, and an obsessive nerd when it comes to Star Wars, comic books, video games, and working on the pond I build in my backyard.
Phew, that is more than I like to write about me, but I wanted to make sure that everyone knew my background as we explore the different ways that makerspaces and project based learning can come together to creating a very powerful learning environment that can benefit all the different types of learners we have in our classrooms.
Starting in May, there will be a monthly post that will explore the different elements of Project Based Learning and how it can be used in the classroom and supported at home. After exploring what Project Based Learning is, I will dive into Makerspaces and show how they can be used to support Project Based Learning. As we build our new Makerspace at University Liggett, there will be plenty of examples to pull from on how everything can be connected to support student learning at school and at home.
If you have any questions, please feel free to reach out in the comment section below or shoot me a message on Twitter. Thanks for taking the time to read this super long post. I promise they will be much shorter in the future. I can’t wait to share our adventures in Project Based Learning and Makerspaces with all of you.
Post 2:
Connecting Project Based Learning and Makerspaces
One of the exciting parts of project based learning is the connections that can be made with a Makerspace. By having a makerspace in your school or classroom, the possibilities open up wider for student creations. First, we need to explore exactly what a makerspace is before we connect it to project based learning.
One of the common ideas about a makerspace is that it is a space that is filled with high tech tools like laser cutters and 3D printers. While some makerspaces have those tools, it is important to note that a makerspace should not be defined by the tools in it. You can have a makerspace that is filled with duct tape, yarm, cardboard, and glue sticks. The idea behind a makerspace is that it is a location that allows people to create what they want with the tools and area available to them. In schools, classrooms might not have the amount of room needed for students to really dive in and create. Another location might be best to house all of the tools and have large tables for student to build. A makerspace does not have to be a room. It can be part of a room or even a cart that rolls from classroom to classroom to bring supplies to students and teachers as needed. Resources can be tight, so everyone has to be able to create the space that is best for their learning environment.
Makerspaces are also designed to support the work that is already happening in classrooms. If teachers already do many projects that involve students filming their ideas, a green screen might be perfect for the makerspace. Maybe students love to build and create entire cities for different projects in social studies class. Legos would be an excellent addition to the makerspace. If there is money to spend on outfitting a makerspace, it is imperative that teachers are consulted to see what they would use most in a space. There is nothing worse that tools gathering dust in a makerspace.
I feel students are limited in the type of projects they submit in class because they do not have access to all the tools they might need. That means plenty of shoeboxes and poster boards will be submitted to the teacher on the the due date. Makerspaces allow for some equity in the school because all students will have access to a wide variety of tools to help them explore their topic in ways that are more meaningful to them. That is what we are trying to accomplish with project based learning in the classroom and that is what is possible by giving students more access to makerspace.
Having a space with dedicated tools to support project based learning is also a great way for teachers to enhance their lessons. With access to a variety of technology and traditional maker supplies, a very diverse set of projects can be created and shared in class based on the interests of the students. This will help the teacher see what students really understand versus what they had access to at home to create their project. While “necessity is the mother of all invention”, having a set standard of tools available for all students allows for all students to have access to create projects that demonstrate understanding and speak to their talents.
Next month, I am going to feature an example of Makerspaces and English Language Arts Classrooms work.
If you have any questions or ideas, please feel free to email me (OneNerdyTeacher@gmail.com) or reach me on Twitter (@TheNerdyTeacher).
Post 3:
I was asked to cover a 7th grade English class for the week and I was allowed to do any mini unit I wanted. I decided I would dive into symbolism using one of my favorite short stories, "The Yellow Wallpaper". It is a wonderful gothic story that symbolizes the oppression of women in society in the early 1900s. It is a short enough story that it can be read or listened to in a single class period and the next couple of days can be used to dive into the details that make it a powerful story.
As a class, we read the story, discussed theme, and annotated looking for symbolism. All of the traditional aspects of an English Language Arts class was there, but instead of a multiple choice test at the end, students used time in the Makerspace and at home to create something to share with the class. These artifacts are tangible representations of their understanding of the material. As a teacher, that is what I'm looking for in any unit I present to students. Here are some of the student examples that have been submitted.


These are just a few of the examples that students have submitted and there will be more in the coming days. The students all wrote a brief 8 sentence paragraph explaining their artifact and how it was connected to the story. The students really enjoyed the freedom to explore and create something different. The teacher I was covering for really liked the lesson and artifacts created by the students and we are going to collaborate on some fun lessons in the future.
Overall, this lesson shows what is possible for students in ELA classes if given the chance to explore project based learning with the support of a maakerspace. Some students chose to create with the laser cutter and others took colored pencil to paper. The projects were meaningful to the students and demonstrated their understanding of the story and what it meant in the big picture by deciphering symbols and connecting them to the theme. As an ELA teacher, what more could you want?
As a class, we read the story, discussed theme, and annotated looking for symbolism. All of the traditional aspects of an English Language Arts class was there, but instead of a multiple choice test at the end, students used time in the Makerspace and at home to create something to share with the class. These artifacts are tangible representations of their understanding of the material. As a teacher, that is what I'm looking for in any unit I present to students. Here are some of the student examples that have been submitted.

Here is a bed designed by a student, cut out of baltic birch on the laser cutter, and the student used their sewing skills to create the mattress, blanket, and the pillows.

A perfectly measured house cut out of baltic birch and assembled using hot glue. The little "Life" character is the lady from the story.

The bars were designed and then cut from baltic birch using the laser cutter to create prison bars. The yellow hands represent the narrator trying to break free from her room and society.

A board game designed and etched on baltic birch using the laser cutter shows the complex path the narrator would have to achieve freedom.

The scene of freedom within sight, but unattainable due to the bars of society.

A depiction of the narrator in a dress that resembles the wallpaper she hates so much shows that she is becoming something she hates.
These are just a few of the examples that students have submitted and there will be more in the coming days. The students all wrote a brief 8 sentence paragraph explaining their artifact and how it was connected to the story. The students really enjoyed the freedom to explore and create something different. The teacher I was covering for really liked the lesson and artifacts created by the students and we are going to collaborate on some fun lessons in the future.
Overall, this lesson shows what is possible for students in ELA classes if given the chance to explore project based learning with the support of a maakerspace. Some students chose to create with the laser cutter and others took colored pencil to paper. The projects were meaningful to the students and demonstrated their understanding of the story and what it meant in the big picture by deciphering symbols and connecting them to the theme. As an ELA teacher, what more could you want?
Post 4
One of things that is important to remember is that implementing new technologies into the classroom is the same as introducing new lessons. You do not scramble to throw everything in at once, you ease into it to all everyone to adjust to the change and see what is possible.
I often compare it to types of races. Education is not a Sprint, it is Marathon. To some, that sounds exhausting, but it is apt because of all of the training that goes into a marathon and becoming a teacher. School years in general are marathons where teachers need to think about all different points of the school year and how they connect, not just what is going to happen the next day. There might be times were we feel like we are sprinting and we might actually be sprinting, but it is important that we keep a set pace, adjust to any obstacles, and make sure we aim for our goal. Even if we don't hit every goal we set out to make, we can be happy that we tried our best, evaluate the marathon and see what we can improve upon for next time, relax, and then start getting ready for the next race.
When considering project based learning for the classroom, it is important to keep that marathon analogy in mind because it is crazy to think that you have to change every lesson right away. Ease into the school year, see what lessons you have that can be tweaked or improved by adding some projects, and then reflect on how it went and how students engaged in the process. The start of the year can be very stressful, so do not add to the stress by thinking about everything you have to do right away. Take it one step at a time and, over the course of the year, you will have many different lessons you have changed.
Post 5
One aspect that is often overlooked in a Makerspace setting is Student Ownership. As teachers, we are so used to "running the show" that it can be hard to give up some of that control to let student fully explore an idea. A Makerspace is all about exploring ideas and we want to make sure that students feel empowered to do that. There are some simple ways that you can do this with your space.
1. Free Make Time: Allow for time that lets the students just use the Makerspace to create whatever they want. Let them explore the tools, collaborate with peers, and just get a sense of the space on their own terms. The more that they see the space as a spot they can explore freely instead of another room where they need to complete assigned work, they will more easily embrace it.
2. Guided projects: I have found that students sometimes do not know where to start in a Makerspace. It can be a bit overwhelming for someone who has never used any of the tools before. A good way to help those students engage in the space and take ownership of the work that happens is to set up some practice projects. They tend to be simple projects that allow students to follow directions and explore what each tool is capable of doing. Instructables is filled with many different projects at varying levels. I would suggest starting there and seeing what you could set up for the space.
3. Embrace the crazy ideas: I have found this one to be the toughest. I have to remind myself that the makerspace is about exploration and expression. If students want to do something crazy, as long as it is safe, I should let them do. Let them make mistakes and try to tackle huge ideas. Always provide guidance and resources, but sometimes, you just need to let them have it. You will find that the students will fully embrace the space if you are supporting their projects.
When students have a sense of ownership of their space, they will feel more comfortable to try new things, explore new ideas, and share with their peers. The students at University Liggett School have decided to create their own Knights Forge Maker Show on YouTube to document the tools they are using and the projects they are creating. They are working on Season Two right now and they are excited for some of the cool Maker Challenges they have prepared. Take a look at their show below.
Post 5
One of the most commons things I get asked about are the types of tools that are a must have for a Makerspace when getting started. It is an understandable question. Sometimes, a teacher is given grant money and they need to spend it quickly and are looking for some tips on what to purchase. To help save some those teachers some time, I will provide what a list of the most popular items in the Knights Forge Innovation Lab at University Liggett School. All of these items were possible through the partnership with Detroit Public Television and a the grant CTN.
If given the time to build a space, the first thing you should do is talk to students and teachers to see what their needs are before going and spending money on big ticket items. As the Makerspace Director, I ordered the following tools based on the needs of the students and the types of projects teachers want students to create in the classroom. This is not an exhaustive list and you do not have to have all or any of these tools to have an amazing space in your room or school. These are just some of the awesome tools in our space that students are using to create tremendous projects.
Copper Tape, Batteries, LEDs

These three items can be used for any project you want to have lights! Teaching simple circuits using the copper tape, batteries, and LEDs is a wonderful way to engage students in Science curriculum. It is also fun to have in the Makerspace when students want to add lights to things. These are very inexpensive purchases that can have many different uses, so stock up your makerspace with these guys and watch the kids have fun.
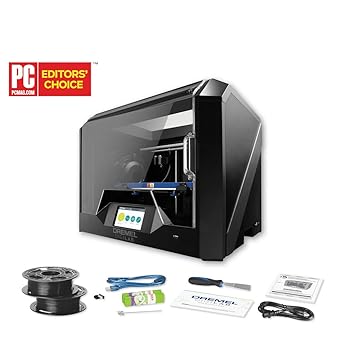
Dremel 3D45 3D Printer


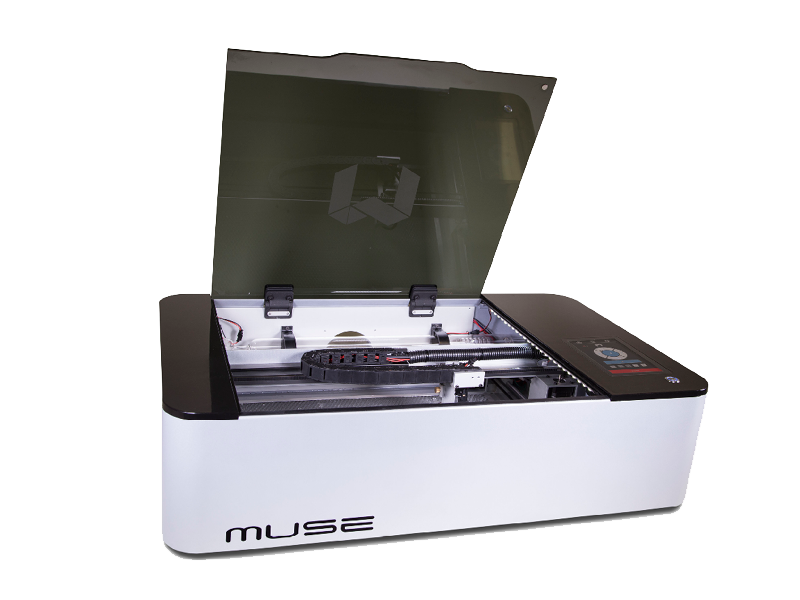
The Muse is the desktop Laser Cutter from Full Spectrum Laser. They have a long history of making laser cutters and this is their hobby laser that is perfect for the classroom. It takes a little bit of patience to set up and align the mirrors, but once that is done, you will be cutting, rastering, etching, and more in no time. The Muse sports a design that allows you to remove the bottom so you can place it on top of larger items (doors, table tops, etc) that do not fit in the machine and still use it to etch designs. The interesting part of the Muse is that you connect to it through the IP address that has the design software. You design on the machine. I like it because it allows you to adjust anything you want before you start. The onboard camera takes a picture of the laser bed to allow for accurate placement of materials and designs. I never thought I would become comfortable using a laser cutter, but it has become an invaluable tool in the Makerspace for teachers and students.
Dry Erase Surfaces
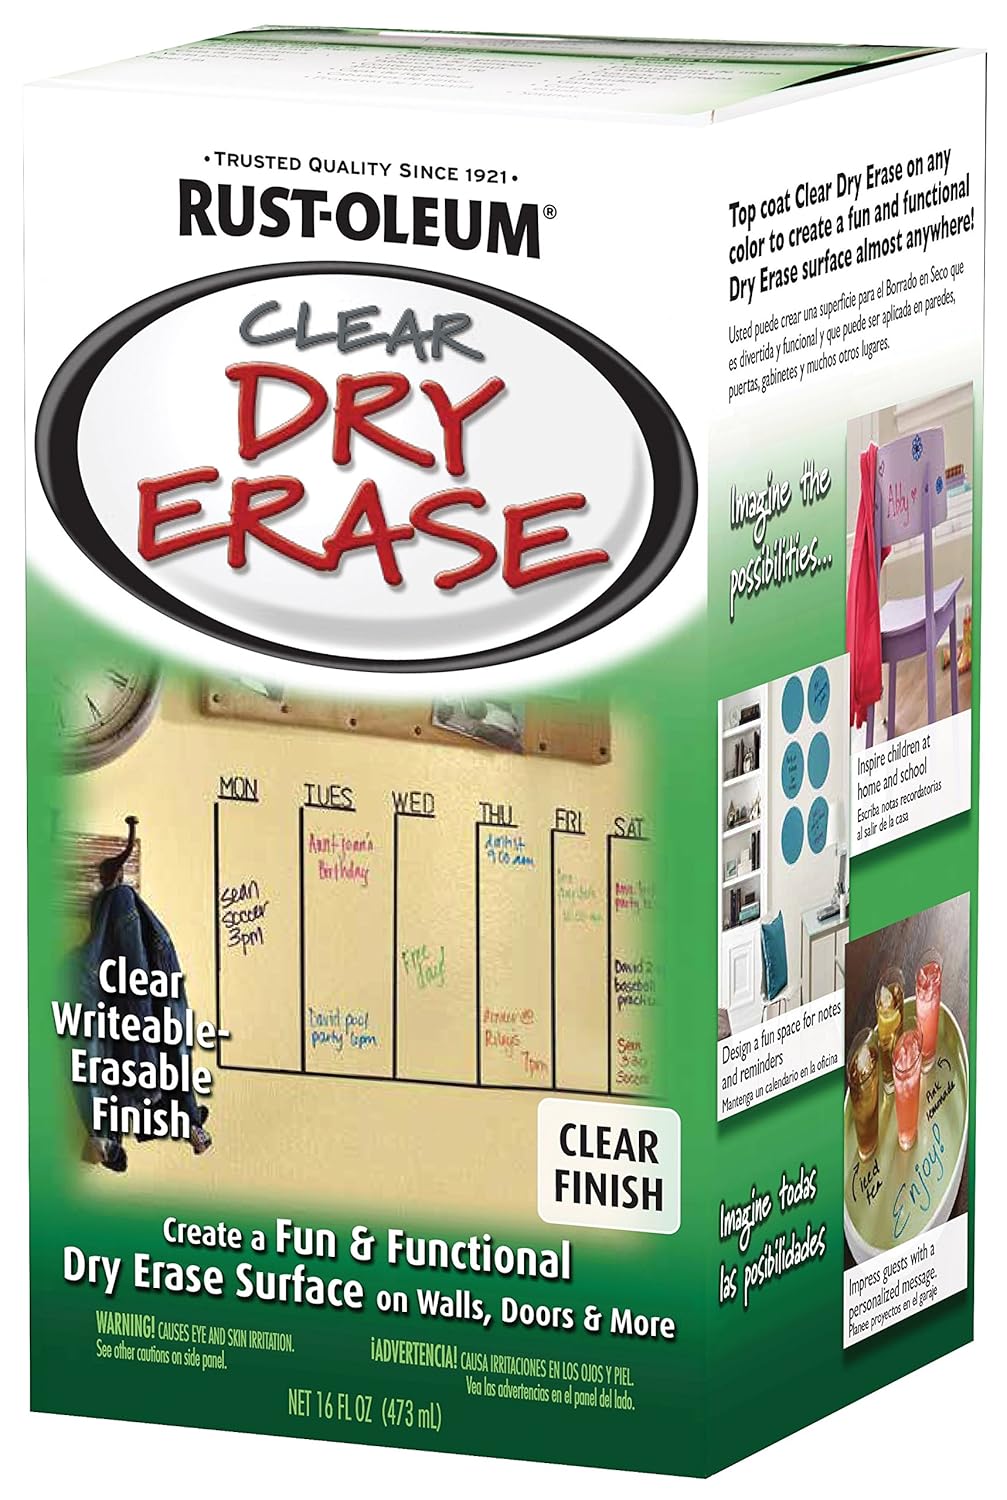
There are many different types of this paint out there. I've used this in the past and I am fan. The students love using the tables to write out their ideas and just brainstorm. Their rough sketches have become full prototypes and teachers love having students in our design room to use those tables. When I had the desks in my class covered in the paint, it was great. Students would jot down notes and take pictures to study for later. The freedom to write on the desk or table to get ideas out during collaboration is a such a nice thing to have. If you have a table or two that could use some love, considering covering it in dry erase paint.
Raspberry Pi
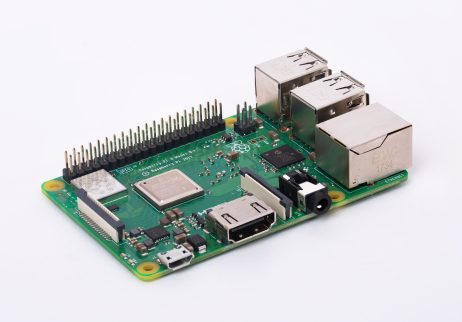
I know that I am a Raspberry Pi Certified Educator and this might seem biased, but I can't help the fact that Pi is so versatile. We have Pis running so many different things in the Middle School, I'm not sure where to even start. A Pi is used to run the monitor in the student commons, I use a Pi to run a monitor that keeps my To Do list and calendar in view. We used Pi to create multiple Retro Pi gaming systems. Pi runs the Pi-Tops in the Makerspace that students use for coding. Pis are at the heart of the physical coding blocks I built. There is so much you can do with the Raspberry Pi that it would be crazy not to have a few of them in the space. You can buy full kits on Amazon for a reasonable price.
I know I left some awesome things on the list, but these are the ones that stand out to me as I sit in our space, The Knights Forge Innovation Lab, and watch the students design and make. I hope everyone has an amazing day and please leave any tools you love in the comments below for others to see.


If given the time to build a space, the first thing you should do is talk to students and teachers to see what their needs are before going and spending money on big ticket items. As the Makerspace Director, I ordered the following tools based on the needs of the students and the types of projects teachers want students to create in the classroom. This is not an exhaustive list and you do not have to have all or any of these tools to have an amazing space in your room or school. These are just some of the awesome tools in our space that students are using to create tremendous projects.
Copper Tape, Batteries, LEDs
Dremel 3D45 3D Printer
We have three of these amazing printers in our space and they are constantly printing. They were used to help print skulls for the high school Forensic Science class to aid in facial reconstruction. Students have used it to make phone cases, parts for a Nerf Gun they were building, and pieces for art projects. This printer has a heated bed to help prevent warping as well as aided leveling. Another awesome part of this printer is that it can print in Nylon and traditional PLA. Further, the filament from Dremel has a chip that allows the printer to read the type of filament you have placed in the printer and all of the settings adjust for that filament. It makes printing so much easier for people new to device and the various settings. The Dremel printers are sturdy and have not caused me a single issue since they were purchased last year.
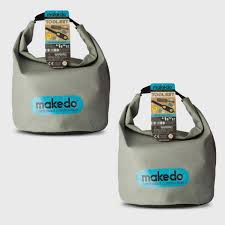
I will very rarely declare something as a must have for a makerspace, but cardboard is one of those consumables that have so many uses. If you are going to have cardboard in your space, then I highly recommend that you pick up a Makedo kit. These kits are plastic screws, saws, and screw drivers that allow users to connect their pieces of cardboard and then reuse the makedo parts as needed. So much duct tape is used in cardboard construction, it can become a bit pricey. The Makedo is perfect is allowing for prototyping ideas in a Makerspace without the waste of tape. My students love these and the help keep the cardboard creations under control.
I love littleBits. There, I said it. These little guys are in constant use by students in the Makerspace. We are always having great discussions on circuits and switches and lots of other fun engineering ideas based on what students are creating with littleBits. The workshop kit might seem a bit pricey, but it allows for multiple students to come together and build. You can also check out the Pro Library Set if you have the funds and want even more students to build using littleBits. I have found that this tools is also great for students who fidget and need something to play with in their hands. Building with these has helped many fidgety students sit and focus while exploring littleBits.
I use this app all of the time with students because it takes a crystal clear image of a student design and allows me to send it through Airdrop of email to my computer or the student's computer. Using the CNC machines or the laser cutter can be time consuming, but if you can just scan a student drawing and upload it directly to the program you are using, life is so much easier. It's a free download on your iOS device and I have been using it for years for personal document scanning and have only just seen the value in capturing student designs with it. It's a simple addition to any space.
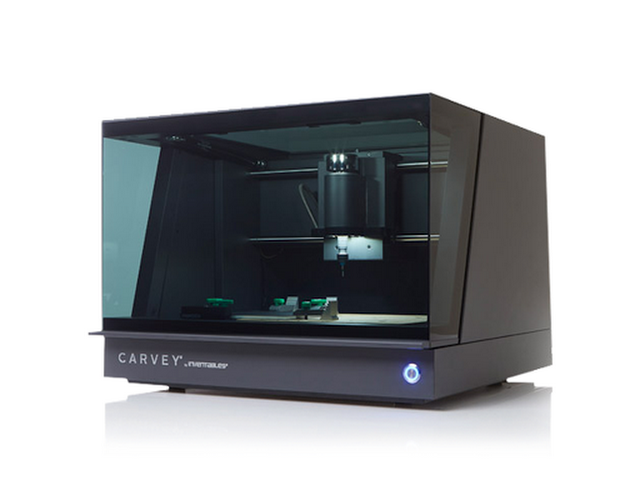
The world of CNC making became a whole bunch easier with the desktop Carvey. This guy is a self contained carving unit that you do not have to assemble. Everything comes ready made for you to dive into the world of CNC carving. Inventables has put together a wonderful product with an easy to use, web-based software that has a free premium account for educators! Each Carvey does need it's own computer because the computer needs to be connected for the duration of the cut job. Using an old laptop stripped down to only run a browser would be fine. Raspberry Pi (Linux) support is possible, but takes a few extra steps if you want to go that route. The Chinese language students designed stamps of their Chinese name and we carved them on the Carvey. It was a fun and simple project for the students. If you are looking for a larger CNC machine for your space, check out the X-Carve from Inventables. That is a heavy duty CNC that requires you, or your students, to assemble. Once it is assembled, you will have a much larger cutting space for creating large signs and other projects. Definitely check them out.
I swear by this tape. I just love it so much. It holds everything down and just where I want it. Students and I have used it for various projects. I recommend this tape as a tape you need while prototyping or building. If you are looking for tape for duct tape projects, there are plenty of other tapes you should use for those projects. This is heavy duty, not messing around, tape that is perfect for a makerspace.
Dry Erase Surfaces
There are many different types of this paint out there. I've used this in the past and I am fan. The students love using the tables to write out their ideas and just brainstorm. Their rough sketches have become full prototypes and teachers love having students in our design room to use those tables. When I had the desks in my class covered in the paint, it was great. Students would jot down notes and take pictures to study for later. The freedom to write on the desk or table to get ideas out during collaboration is a such a nice thing to have. If you have a table or two that could use some love, considering covering it in dry erase paint.
Raspberry Pi
I know that I am a Raspberry Pi Certified Educator and this might seem biased, but I can't help the fact that Pi is so versatile. We have Pis running so many different things in the Middle School, I'm not sure where to even start. A Pi is used to run the monitor in the student commons, I use a Pi to run a monitor that keeps my To Do list and calendar in view. We used Pi to create multiple Retro Pi gaming systems. Pi runs the Pi-Tops in the Makerspace that students use for coding. Pis are at the heart of the physical coding blocks I built. There is so much you can do with the Raspberry Pi that it would be crazy not to have a few of them in the space. You can buy full kits on Amazon for a reasonable price.
Exploring the Hour of Code
The Hour of Code is a great program that takes place every year in during Computer Science Education Week. This year, it takes place from December 3-9. The nice part of The Hour of Code is that it can actually take place anytime of the year you want and a Makerspace is a great spot to help students explore code.
There are many different places you can go to explore coding as a beginner and it doesn't matter how old or young you are to start. Below are a couple of wonderful resources for people new to coding should start exploring before going off on their own to find the tools that work best for them.
Code.org is an amazing resource that helps all people that are new to coding understand how it works and provides a fun and engaging framework that will have you hooked on coding. Here are some stats from Code.org

I really like Code.org because they spend time working with other companies to create fun games that allow people to explore coding in an exciting way. I have not seen my students bored with spending time on Code.org during our Hour of Code. With links to Star Wars and Minecraft, students can create games and explore code in many different ways.
Code.org allows for teachers to create their own classes, have students join the classes, and assign them coding modules based on individual skill level. The ability to personalize the coding is so important for those that are interested in learning to code because some parts will take others longer than some. Being able to personalize and track their work will help the teacher support the students as they explore the code on their own.
Code.org is a wonderful entry point into coding. It doesn't have to be used just during The Hour of Code, but that is a wonderful time to introduce the idea of coding to students to see who might be interested in exploring Computer Science down the line.
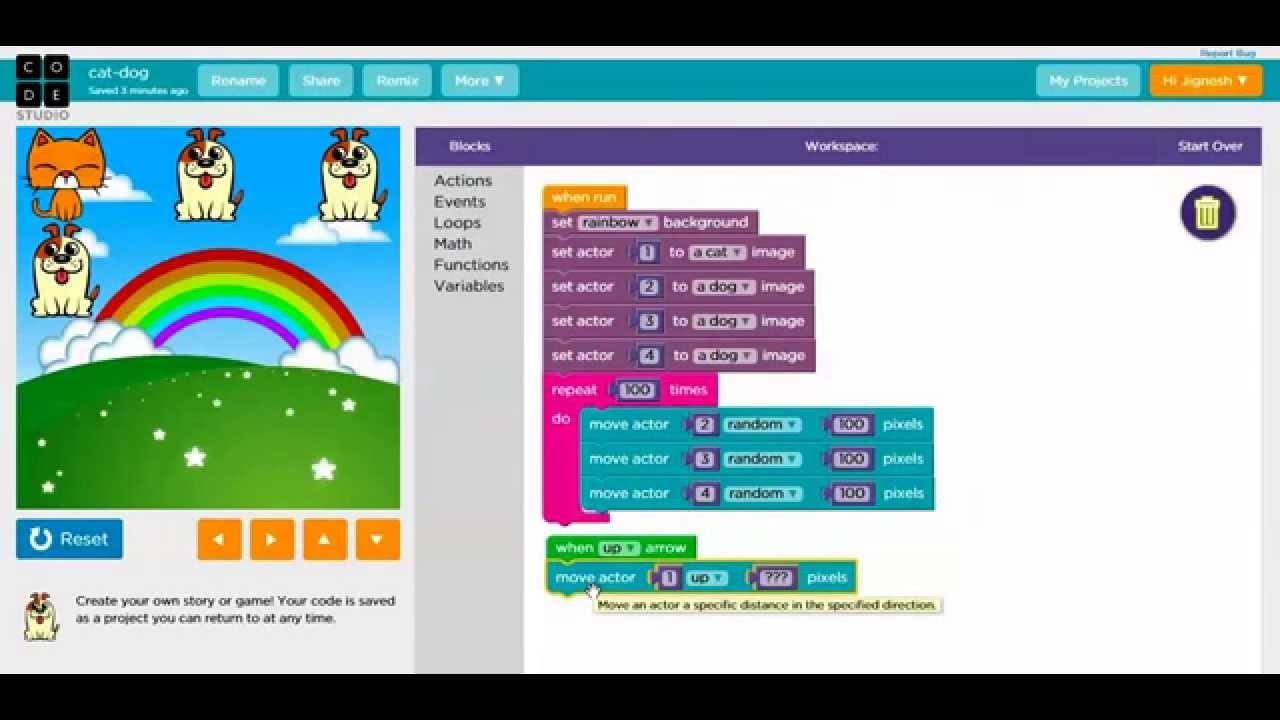
Scratch is another wonderful, and free, coding program that is perfect for beginners. MIT has put together this wonderful block based coding program that has helped thousands and thousands of students all over the world. From building their own video games to creating interactive art, Scratch allows users to create with code simply and quickly.
When I started to exploring code, Scratch was my go to resources because it made the exploration less scary for me. I could move blocks around, snap them together, and watch the cat dance around the screen. The color coded blocks are perfect in helping me remember what each type of block does and how they all interact and connect. Students love experimenting with the different features of Scratch and have made some amazing projects. The robust community that surrounds Scratch allows for students to explore the work others have done, look underneath the hood at the code, and then create their own version.
Scratch and Code.org are just two of many amazing resources for your to explore if you are interested in learning more about how to code and bring it to your children at home or the students in your classroom. It can be tough to find the time to learn something new like coding, but these programs are perfectly designed to all you to pace yourself and help your young learners understand code.
No comments:
Post a Comment
Please post your thoughts here. Thanks!