Showing posts with label #MakerMentality. Show all posts

Friday, April 26, 2019

New Podcast Episode: Talking Creativity with Jaime Casap (@JCasap) #MakerEd

I'm so happy I was able to sit down with Jaime Casap and talk about Creativity and its value inside and outside of the world of education. As Google's Educational Evangelist, he shares what he sees in education and has decided to share more of insights on a new YouTube channel.

Here is the episode that can also be found on all of your favorite podcasting stations.


Here is an episode of Jaime's new YouTube channel. 


Thanks for listening and feel free to reach out if you have any suggestions for guests on the show. 

Hugs and High Fives, 

NP

Monday, November 19, 2018

What I Learned About Literacy After I Left The English Classroom #EngChat #Literacy

Making the decision to move from my high school English Literature and Composition job after 15 years to build a makerspace and support tech integration for teachers, was very tough. I loved working with students and helping them read and evaluate texts. I thought I would never again be able to work with students to help them explore the deeper meaning of a piece of poetry and how it connects to their lives. After a year and a few months in my job, there are some thing I have learned about literacy that were not clear to me while in the classroom.

Literacy takes many forms

One of the things I would always focus on in my classroom is the importance of reading, writing, and speaking. All three allow a person to understand and communicate. No matter where you go in life, these three things will always help you. I see that this is only partially true. A person can read, write, and speak well, but if they do not know how to use those tools to problem solve, how helpful are they truly going to be? Watching students struggle to solve problems in the makerspace has shown me that there needs to be more time given to teaching these problem solving skills as part of their overall literacy. Using those skills to know how to identify a problem, research the appropriate sources, create a protoype, and articulate the problem and solution to others is very important.

There is not such thing as grade or age appropriate (kind of)

All too often, students would want to read something or explore something and they would be told that is not appropriate for their grade or age. The curriculum is designed to for grade and age appropriateness and teachers are stuck in that box. In the makerspace, I have learned that there is no such thing as age or grade appropriateness. If the student is willing to take on the challenge of something complex and want to work their way through it, why should I, or the school, stand in their way? For those that are going to say things like, "So I should let me 5th grader read "Fifty Shades of Grey'?" No, you shouldn't, but you should probably talk to them about why they want to read it and see what is at the root of their request. Let students experiment and push the boundaries of their reading, writing, and making. That is where they will learn the most.

The struggle is real and important

It can be so easy to just write the topic sentence for the student or do the citation for them. It is much faster when you have 29 other students to conference with over the next 40 minutes. However, they struggle of learning to read and write is so important as long as students are allowed to feel comfortable to try and fail. I think I got better with the try and fail aspect of writing in my class, but, for too long, it was a one attempt and move on mentality in my classroom. The Makerspace has shown me how effective a try, fail, try again approach to learning is needed in literacy and everywhere else in schools. Give student the time to experiment with their poetry or their essays. Give the students time to try new rhetorical devices. Let them struggle to find their personal, beautiful, and authentic voice by trying as many voices as they like until the find the one that is just right for them.

Leaving the direct instruction position after 15 years to a position that supports students and teachers in different ways has allowed me to take a step back and really see what literacy, and instruction overall, can and should look like. The best I can do now is share with the teachers around me and write on this blog.


Wednesday, October 31, 2018

Makespace Starter Kit #MakerEd #MakerMentality

One of the most commons things I get asked about are the types of tools that are a must have for a Makerspace when getting started. It is an understandable question. Sometimes, a teacher is given grant money and they need to spend it quickly and are looking for some tips on what to purchase. To help save some those teachers some time, I will provide what a list of the most popular items in the Knights Forge Innovation Lab at University Liggett School.

If given the time to build a space, the first thing you should do is talk to students and teachers to see what their needs are before going and spending money on big ticket items. As the Makerspace Director, I ordered the following tools based on the needs of the students and the types of projects teachers want students to create in the classroom. This is not an exhaustive list and you do not have to have all or any of these tools to have an amazing space in your room or school. These are just some of the awesome tools in our space that students are using to create tremendous projects.

Copper TapeBatteriesLEDs


These three items can be used for any project you want to have lights! Teaching simple circuits using the copper tape, batteries, and LEDs is a wonderful way to engage students in Science curriculum. It is also fun to have in the Makerspace when students want to add lights to things. These are very inexpensive purchases that can have many different uses, so stock up your makerspace with these guys and watch the kids have fun.


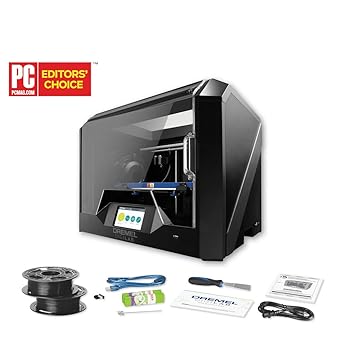
Dremel 3D45 3D Printer


We have three of these amazing printers in our space and they are constantly printing. They were used to help print skulls for the high school Forensic Science class to aid in facial reconstruction. Students have used it to make phone cases, parts for a Nerf Gun they were building, and pieces for art projects. This printer has a heated bed to help prevent warping as well as aided leveling. Another awesome part of this printer is that it can print in Nylon and traditional PLA. Further, the filament from Dremel has a chip that allows the printer to read the type of filament you have placed in the printer and all of the settings adjust for that filament. It makes printing so much easier for people new to device and the various settings. The Dremel printers are sturdy and have not caused me a single issue since they were purchased last year. 


I will very rarely declare something as a must have for a makerspace, but cardboard is one of those consumables that have so many uses. If you are going to have cardboard in your space, then I highly recommend that you pick up a Makedo kit. These kits are plastic screws, saws, and screw drivers that allow users to connect their pieces of cardboard and then reuse the makedo parts as needed. So much duct tape is used in cardboard construction, it can become a bit pricey. The Makedo is perfect is allowing for prototyping ideas in a Makerspace without the waste of tape. My students love these and the help keep the cardboard creations under control. 


I love littleBits. There, I said it. These little guys are in constant use by students in the Makerspace. We are always having great discussions on circuits and switches and lots of other fun engineering ideas based on what students are creating with littleBits. The workshop kit might seem a bit pricey, but it allows for multiple students to come together and build. You can also check out the Pro Library Set if you have the funds and want even more students to build using littleBits. I have found that this tools is also great for students who fidget and need something to play with in their hands. Building with these has helped many fidgety students sit and focus while exploring littleBits. 


I use this app all of the time with students because it takes a crystal clear image of a student design and allows me to send it through Airdrop of email to my computer or the student's computer. Using the CNC machines or the laser cutter can be time consuming, but if you can just scan a student drawing and upload it directly to the program you are using, life is so much easier. It's a free download on your iOS device and I have been using it for years for personal document scanning and have only just seen the value in capturing student designs with it. It's a simple addition to any space. 
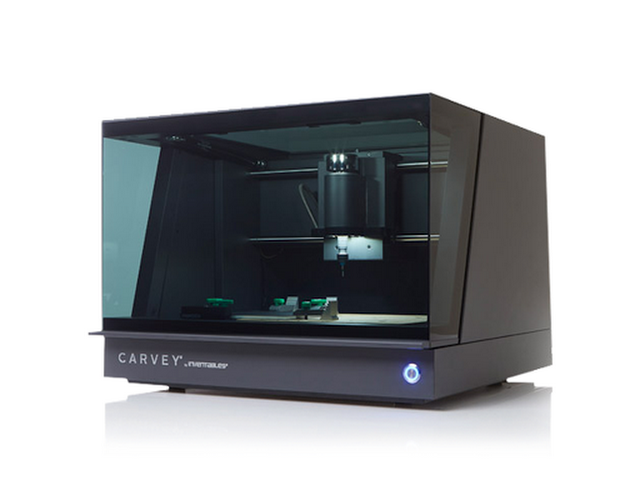

The world of CNC making became a whole bunch easier with the desktop Carvey. This guy is a self contained carving unit that you do not have to assemble. Everything comes ready made for you to dive into the world of CNC carving. Inventables has put together a wonderful product with an easy to use, web-based software that has a free premium account for educators! Each Carvey does need it's own computer because the computer needs to be connected for the duration of the cut job. Using an old laptop stripped down to only run a browser would be fine. Raspberry Pi (Linux) support is possible, but takes a few extra steps if you want to go that route. The Chinese language students designed stamps of their Chinese name and we carved them on the Carvey. It was a fun and simple project for the students. If you are looking for a larger CNC machine for your space, check out the X-Carve from Inventables. That is a heavy duty CNC that requires you, or your students, to assemble. Once it is assembled, you will have a much larger cutting space for creating large signs and other projects. Definitely check them out. 


I swear by this tape. I just love it so much. It holds everything down and just where I want it. Students and I have used it for various projects. I recommend this tape as a tape you need while prototyping or building. If you are looking for tape for duct tape projects, there are plenty of other tapes you should use for those projects. This is heavy duty, not messing around, tape that is perfect for a makerspace. 
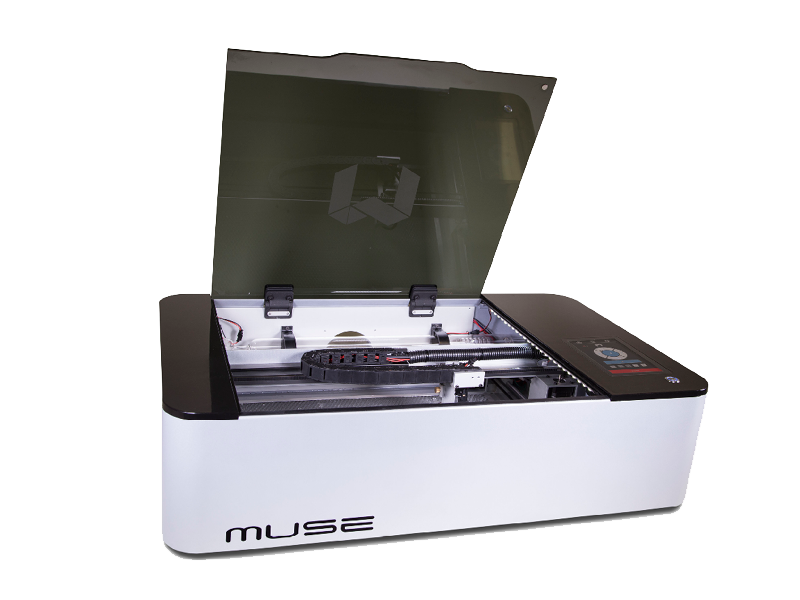


The Muse is the desktop Laser Cutter from Full Spectrum Laser. They have a long history of making laser cutters and this is their hobby laser that is perfect for the classroom. It takes a little bit of patience to set up and align the mirrors, but once that is done, you will be cutting, rastering, etching, and more in no time. The Muse sports a design that allows you to remove the bottom so you can place it on top of larger items (doors, table tops, etc) that do not fit in the machine and still use it to etch designs. The interesting part of the Muse is that you connect to it through the IP address that has the design software. You design on the machine. I like it because it allows you to adjust anything you want before you start. The onboard camera takes a picture of the laser bed to allow for accurate placement of materials and designs. I never thought I would become comfortable using a laser cutter, but it has become an invaluable tool in the Makerspace for teachers and students.

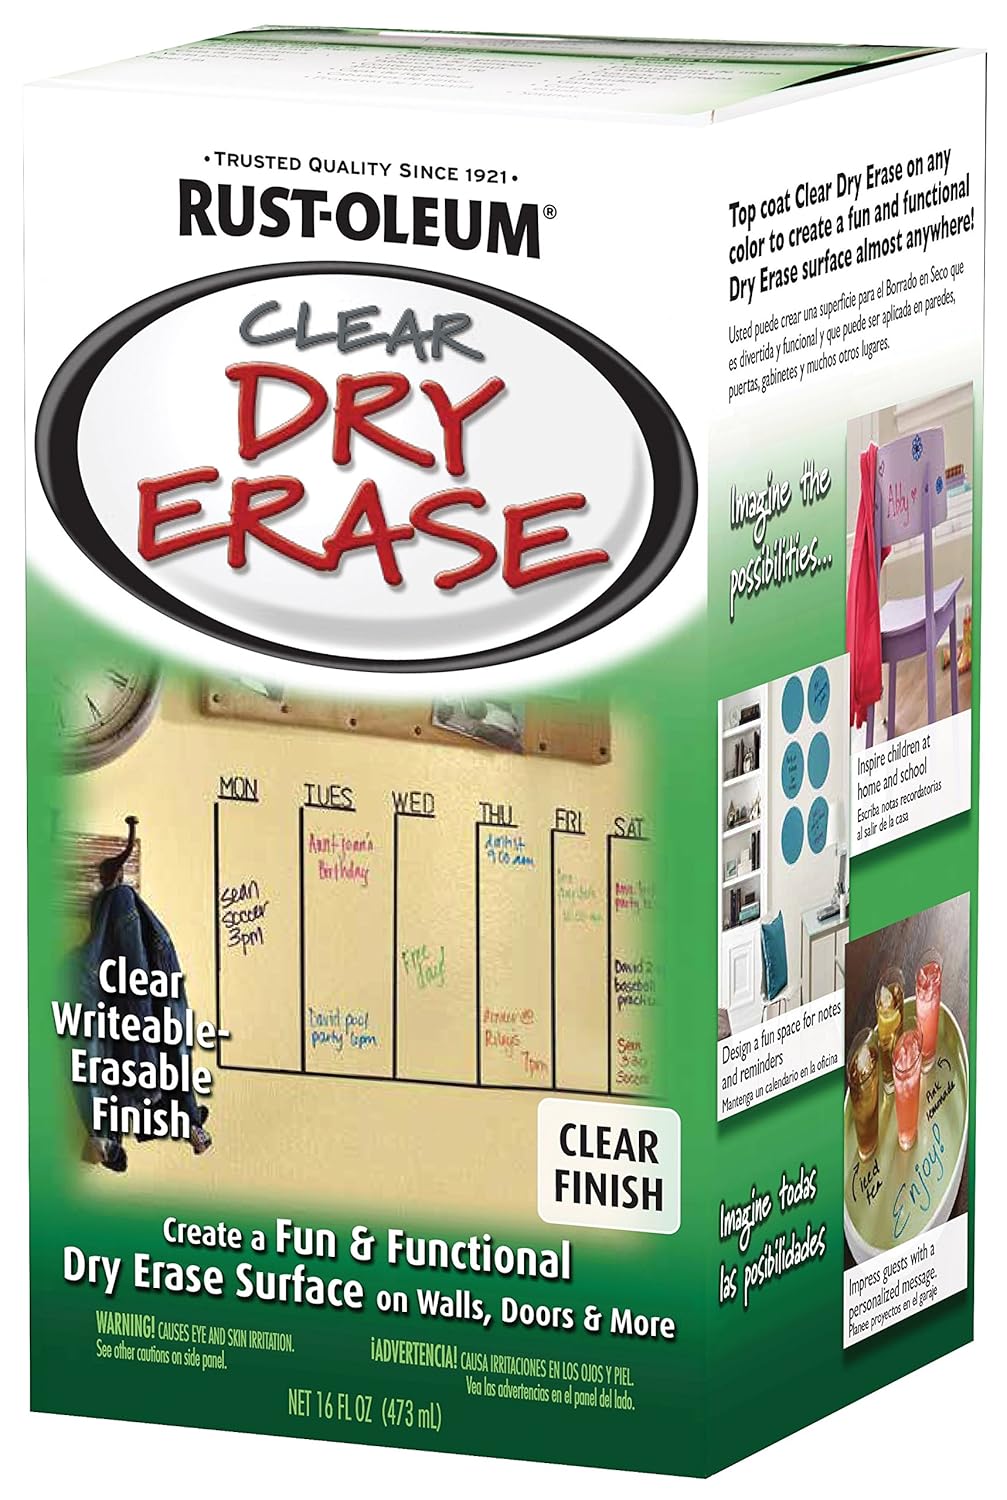
Dry Erase Surfaces


There are many different types of this paint out there. I've used this in the past and I am fan. The students love using the tables to write out their ideas and just brainstorm. Their rough sketches have become full prototypes and teachers love having students in our design room to use those tables. When I had the desks in my class covered in the paint, it was great. Students would jot down notes and take pictures to study for later. The freedom to write on the desk or table to get ideas out during collaboration is a such a nice thing to have. If you have a table or two that could use some love, considering covering it in dry erase paint.

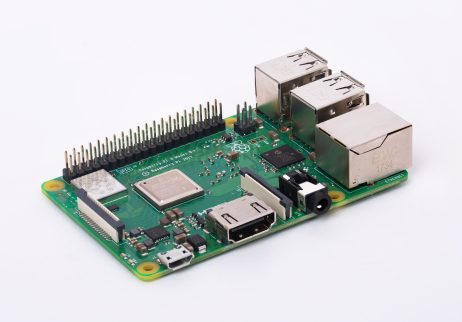
Raspberry Pi


I know that I am a Raspberry Pi Certified Educator and this might seem biased, but I can't help the fact that Pi is so versatile. We have Pis running so many different things in the Middle School, I'm not sure where to even start. A Pi is used to run the monitor in the student commons, I use a Pi to run a monitor that keeps my To Do list and calendar in view. We used Pi to create multiple Retro Pi gaming systems. Pi runs the Pi-Tops in the Makerspace that students use for coding. Pis are at the heart of the physical coding blocks I built. There is so much you can do with the Raspberry Pi that it would be crazy not to have a few of them in the space. You can buy full kits on Amazon for a reasonable price.

Your Starter Guide to Makerspace and The Maker Mentality


I know I am biased, but these books are really great at helping teachers and administrators understand the value of a Makerspace, how to build one, and how to create a culture around making that will support the makerspace. I've been lucky to see my book shared all over the world and in book studies in individual schools. These books are everyman's approach to making and makerspaces. If you have any questions about getting these books or starting your own book study, please shoot me an email and we can connect. 

I know I left some awesome things on the list, but these are the ones that stand out to me as I sit in our space, The Knights Forge Innovation Lab, and watch the students design and make. I hope everyone has an amazing day and please leave any tools you love in the comments below for others to see.


Monday, October 8, 2018

Writing IS Making #MakerEd #CSforAll

The more I have spent time sharing Making and Makerspace with people, the more I get to reflect on those conversation and see how others perceive the act of making. I also spend time thinking about my own practices and how I used to teach in my English classes. The one thing that stands out is that writing is an act of making that should be in the same conversation as coding, 3D design, and other forms of creation.

When I work with students and teachers, the focus of making is not learning tools. The focus is on designing to meet the task at hand. The process looks a little like this;

1. Identify the problem or question

2. Generate ideas to address the problem/question

3. Prototype one or multiple of those ideas

4. Evaluate the prototype and have others offer feedback

5. Iterate the prototype or start over with a different concept

6. Repeat steps 3-5 until a final concept is found.

7. Take prototype and turn it into a final product.

8. Share your final product

(Editor's Note: Now, these are not the end all be all steps in the making process. Every person with have their own steps and some mini-steps that fit in here. There are things I might not have written that I take for granted as part of one of these steps. The point I'm trying to get at is that I don't want people to feel that this is a set in stone guideline on how to make.)

These are steps I present to teachers as they plan lessons that involve Project Based Learning and will require students to create an artifact to demonstrate understanding. I also use these steps to support students as they explore creating something that really want. As I started to articulate these steps, I noticed something that connected to my English background. This is the very similar to the writing process.

For writing, I would ask my students to follow this process when writing,

1. What is the question you are being asked to address or the assignment you were given?

2. Generate different ideas to address the topic of this paper or assignment.

3. Put together a rough draft of one of your ideas.

4. Review your rough draft and share with others for their feedback.

5. Make corrections and change the piece based on feedback and observation.

6. Repeat steps 4 and 5 until a final draft emerges.

7. Submit final draft to class.

This writing process can work for a formal essay, a short story, a poem, or any other form of writing. When people talk about STEM only used for Makerspaces, it really bothers me because the Arts belong in a Makerspace. We need to bring all of these pieces together to form STEAM so that all students can feel like the type of making they want to do is valid.

For ELA teachers, I want you to look at this model and see how similar it is to the writing process and I hope you feel more comfortable trying to integrate other forms of making into your classroom. If the students mirror the writing process, they can follow the maker process because they are one in the same.

This one of the ways that The Maker Mentality works across curriculum and can help create a culture that all students and teachers are makers that just use different mediums. So, before you dismiss writing as an act of making, focus on the process and not the tools. I think you will see that making is all around you. 

Thursday, September 6, 2018

Hacking And Making Are Best Friends! #MakerEd

One of the things that I love about Making is taking something older and doing something different with it or altering it in some way. I've done this in many different ways over the past few years. One that stands out is turning this old rotary phone into an Airplay device with a Raspberry Pi.


It was a fun projects that really tested my design skills and my soldering skills as well. It was one of my first big projects using Raspberry Pi that was not just recreating something someone else had designed and made.

I was thinking about doing something kind of fun and retro with an old Nintendo cartridge and came up with something pretty fun. I was able to take apart The Adventures of Zelda and place a Raspberry Pi Zero W inside of it.


A post shared by Nicholas Provenzano (@thenerdyteacher) on

For those interested, here are the steps.

1. Unscrew the back of the cartridge.
2. Remove the hardware on the inside of the cartridge.
3. On the piece that is the back, there is a little plastic lip near the bottom of the cartridge. You need to clip this away so the ports of the Raspberry Pi Zero W will fit.
4. Secure the Raspberry Pi Zero W in place. I used hot glue in the corners. It needs to be secure so it does not shift when you plug into the device.
5. Attach the HDMI mini adapter, a micro USB dongle, and the micro USB power cord. Make sure the cords you are using fit nicely when the lid is placed on. You can easily check this without screwing the cartridge together.
6. Place your micro SD card in the Pi with the image you would like.
7. Screw it all together and you are ready to go.

It was fun taking something from an idea and getting to work on it in my makerspace at home. I encountered some problems and was worried it would not come together, but it all worked out in the end.

These are one of the types of projects I will be encouraging students to explore in the school makerspace. Hacking something to change it in a way that allows it to be used differently is part of the Maker Mentality and it is a wonderful exercise in creative problem solving and design thinking. How have you hacked different projects in your home/school? I'd love to see them and share them around. Tweet me (@TheNerdyTeacher) and use the hashtag #MakerMentality and we can all share in the hacking fun.


Tuesday, August 14, 2018

The Maker Mentality Podcast #MakerEd #MakerMentality

Hello Makers!

I've been thinking about starting a new podcast for quite some time. I had fun with my NerdyCast and people asked if there was a chance for a new episode down the line. I thought I would try something new and have a Maker focused show that allows other great MakerEd folks share some tips, tricks, and tools on MakerEd! I'm using Anchor to house all of my episodes, but you can find all of them on other podcasting platforms as well. Here is a list,

Google Podcasts
Spotify
Breaker
Pocket Casts
RadioPublic
Stitcher

I will be recording and posting based on the availability of my guests. I like this format because it allows people to binge listen if they want. I also promise to keep episodes in the 15-20 minute range. That is tough for me because I like to hear people share awesome things, but I want to make these podcasts episodes be digestible for the average listener. Here is an embedded widget that has the most recent episode, so feel free to listen right here if you want.


If you have ideas for guests or topics, please feel free to reach out to me on Twitter or by leaving a comment below. Thanks for all of your support and I can't wait to hear all of the amazing things Makers are going to share on the podcast!

Hugs and high fives, 

Nick