
I've been meaning to write this post sooner, but I have been so swamped with Snow Days and working with students in ELA classrooms to write their own text based computer game, this got pushed back. I'm excited to show off some cool things I saw while at FETC in Orlando.
Makerbot Method
I had a chance to stop by the Makerbot booth and check out their new printer, the Makerbot Method. This is a beautiful printer. It is fully enclosed and has this awesome feature that circulates warm air all around the print to prevent warping. Traditional printers only have a heated bed. This was an awesome addition to the printer. The dual head extruder is also very important addition to the Makerbot line. Being able to print in multiple colors or use the soluble filament to create items that need support is a big step in the right direction for Makerbot. The full body metal design prevents flexing that can cause issues on fast print jobs.
I watched the printer in action and I was very impressed at the speed and the quality of the prints. In an educational setting, I see the Method being used in advanced design classes and Makerspaces that are being used by people with serious design skills. With a $6500 price tag, this is not your casual purchase for your space. Long term, I think Makerbot has created a high performance desktop printer that can really add a nice option to any school or Makerspace that is in need of quality print jobs for finished products.
HoverCam Pilot

I was wandering the floor and I was drawn to this podium like a moth to a flame. I am always looking for things that might be able to support the design aspect of the makerspace. I want to make it easy and fluid to share work with students and for them to share their work with others. Having a wireless podium that can share my computer screen, iDevice, or something I'm drawing with their document camera has everything one would need in a single device. I was super excited at the possibilities of the HoverCam Pilot. The mobile podium also allows the user the freedom to move about a space and go to students instead of students having to get up and come to the front of the room. With a distance of 50ft, you can move far away from the screen and still be connected. I like that because it does not force someone to still be stuck to the front of the room.
The Pilot has a Windows computer built into it, but you can add your own device to showcase work. I was thinking about how adding Minecraft to the Windows device would allow me to showcase student work to everyone on the screen very easily. I also love the attached document camera because student designs and sketches take physical forms, not just digital. I like the idea of having a student being able to easily share their work on the podium for the class to see. I think it creates a wonderful environment that supports design and sharing. You can check out the full specs on the Pilot here.
TRUTOUCH RS Series

Whenever I go to a conference, I seem to notice their are more "screen" companies out there on the expo floor. I tend to get frustrated with some of them because they require specific software to run their screen. I was really excited to talk to the people at Newline-Interactive because their TRUTOUCH monitors are amazing and do NOT require proprietary software to work on your device. The user interface on the screen is one of the most intuitive I have ever come across. You can even personalize objects on the screen to pull up commonly used apps on your device. That is awesome! I have found that some screens and software are super complex to get started and use and teachers do not have the time to explore those hidden menus to get to what they want.
The screen comes in 65", 75", 86", and 98" sizes to suit your visual needs. As I look around the Makerspace, having a board that allows students to connect and share without the need to download specific software is a nice solution to have in any classroom. You want sharing to be seamless and the RS Series allows for that to happen. You can actually connect up to 4 screens to the board and switch between the ones you want to see at any time. You can also instantly annotate on the boards to get ideas out quickly. I love the ability to annotate on boards so the ideation process can be fluid. If you are looking for a simple screen solution that does not make you beholden to software licenses, you need to check out the TRUTOUCH RS Series. I think it will be exactly what you need.
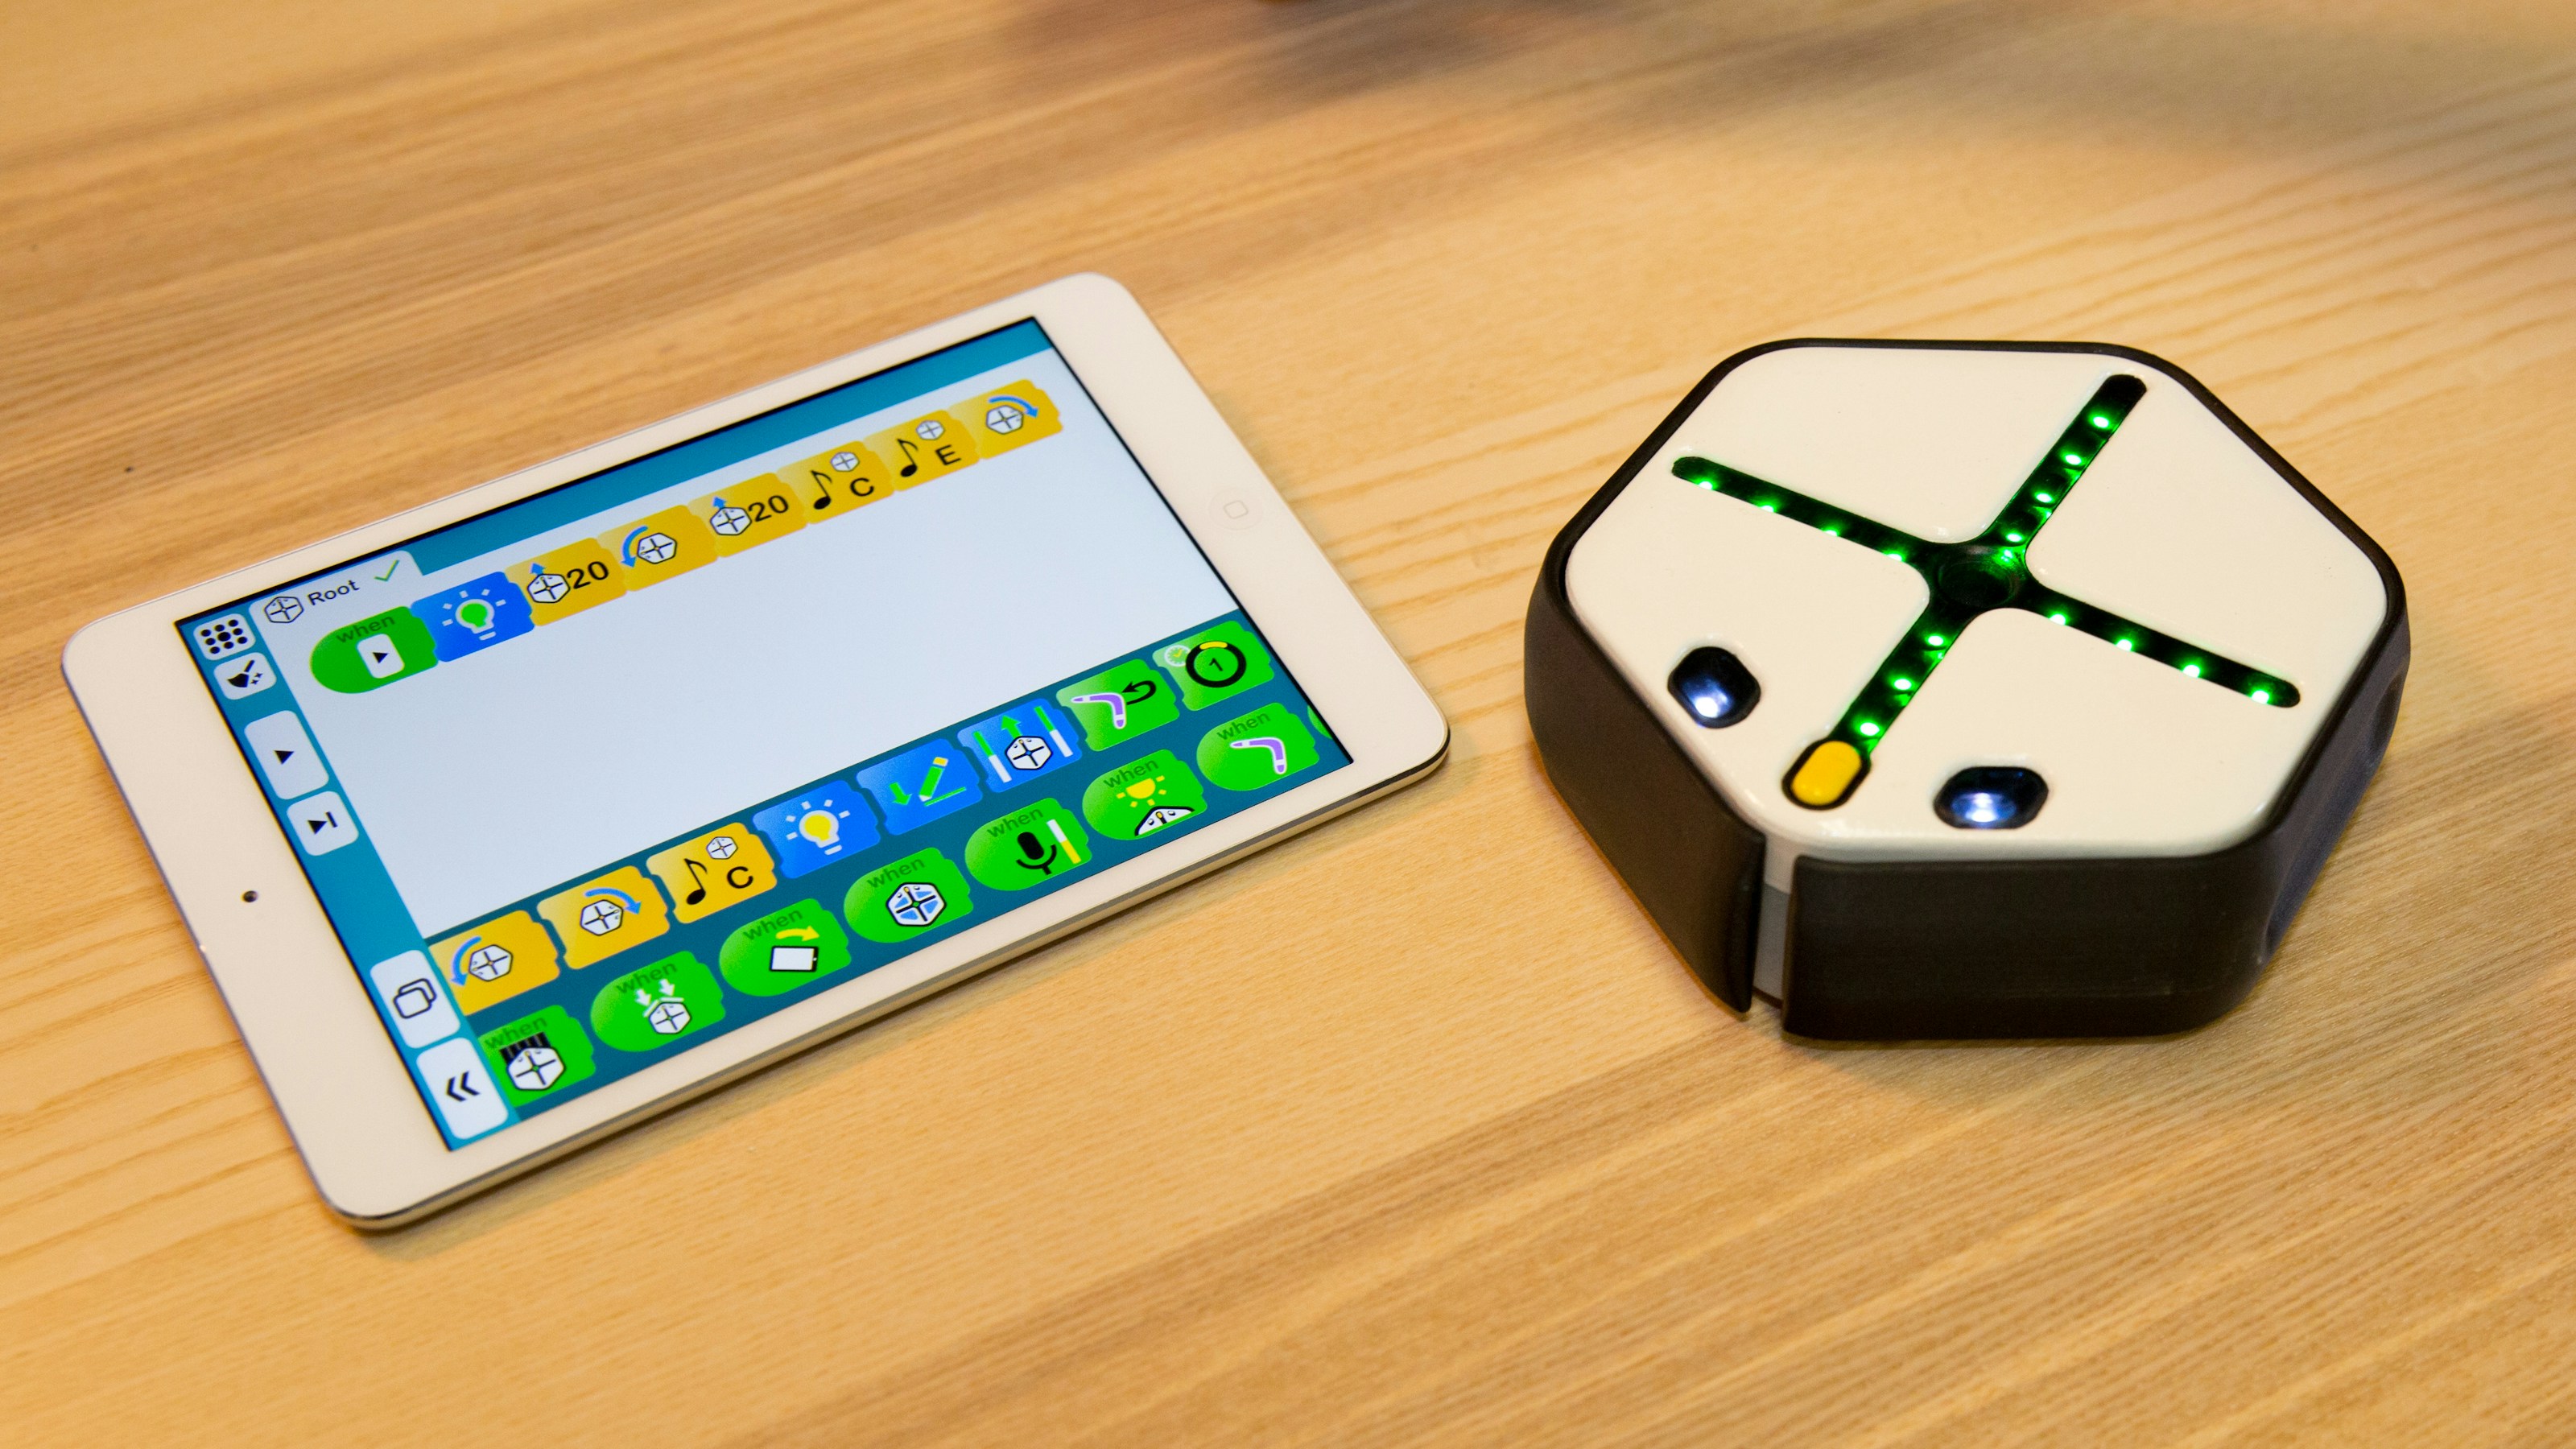
Root
I have to share about Root here because I think it is such a cool tool to support young learners who might be interested in coding. Root is one of the more diverse coding robots I've seen out there and it can do some pretty cool things. It can draw. It has four touch panels on the top. It has touch sensors that enable it to bounce off walls. It has strong magnets that allow it to move around magnetic surfaces, including walls! It can scan for colors and react to what your draw based on your code. It can erase lines you have drawn. A light that you can code and a light sensor that can react to changes in brightness. It can even play music you compose through code.
Makerbot Method
I had a chance to stop by the Makerbot booth and check out their new printer, the Makerbot Method. This is a beautiful printer. It is fully enclosed and has this awesome feature that circulates warm air all around the print to prevent warping. Traditional printers only have a heated bed. This was an awesome addition to the printer. The dual head extruder is also very important addition to the Makerbot line. Being able to print in multiple colors or use the soluble filament to create items that need support is a big step in the right direction for Makerbot. The full body metal design prevents flexing that can cause issues on fast print jobs.
I watched the printer in action and I was very impressed at the speed and the quality of the prints. In an educational setting, I see the Method being used in advanced design classes and Makerspaces that are being used by people with serious design skills. With a $6500 price tag, this is not your casual purchase for your space. Long term, I think Makerbot has created a high performance desktop printer that can really add a nice option to any school or Makerspace that is in need of quality print jobs for finished products.
HoverCam Pilot

I was wandering the floor and I was drawn to this podium like a moth to a flame. I am always looking for things that might be able to support the design aspect of the makerspace. I want to make it easy and fluid to share work with students and for them to share their work with others. Having a wireless podium that can share my computer screen, iDevice, or something I'm drawing with their document camera has everything one would need in a single device. I was super excited at the possibilities of the HoverCam Pilot. The mobile podium also allows the user the freedom to move about a space and go to students instead of students having to get up and come to the front of the room. With a distance of 50ft, you can move far away from the screen and still be connected. I like that because it does not force someone to still be stuck to the front of the room.
The Pilot has a Windows computer built into it, but you can add your own device to showcase work. I was thinking about how adding Minecraft to the Windows device would allow me to showcase student work to everyone on the screen very easily. I also love the attached document camera because student designs and sketches take physical forms, not just digital. I like the idea of having a student being able to easily share their work on the podium for the class to see. I think it creates a wonderful environment that supports design and sharing. You can check out the full specs on the Pilot here.
TRUTOUCH RS Series
The screen comes in 65", 75", 86", and 98" sizes to suit your visual needs. As I look around the Makerspace, having a board that allows students to connect and share without the need to download specific software is a nice solution to have in any classroom. You want sharing to be seamless and the RS Series allows for that to happen. You can actually connect up to 4 screens to the board and switch between the ones you want to see at any time. You can also instantly annotate on the boards to get ideas out quickly. I love the ability to annotate on boards so the ideation process can be fluid. If you are looking for a simple screen solution that does not make you beholden to software licenses, you need to check out the TRUTOUCH RS Series. I think it will be exactly what you need.
Root
I have to share about Root here because I think it is such a cool tool to support young learners who might be interested in coding. Root is one of the more diverse coding robots I've seen out there and it can do some pretty cool things. It can draw. It has four touch panels on the top. It has touch sensors that enable it to bounce off walls. It has strong magnets that allow it to move around magnetic surfaces, including walls! It can scan for colors and react to what your draw based on your code. It can erase lines you have drawn. A light that you can code and a light sensor that can react to changes in brightness. It can even play music you compose through code.
Through a simple block based app, you can control what the Root does and when it does it. I had a chance to play with the Root and I loved the UI on the app and the ease of adding the marker and having it draw out the coded designs. There are so many different uses for the Root, I think it is a nice addition to any classroom looking to add some code based robotics to the mix.
No comments:
Post a Comment
Please post your thoughts here. Thanks!